

📐 How to Draw — Step by Step
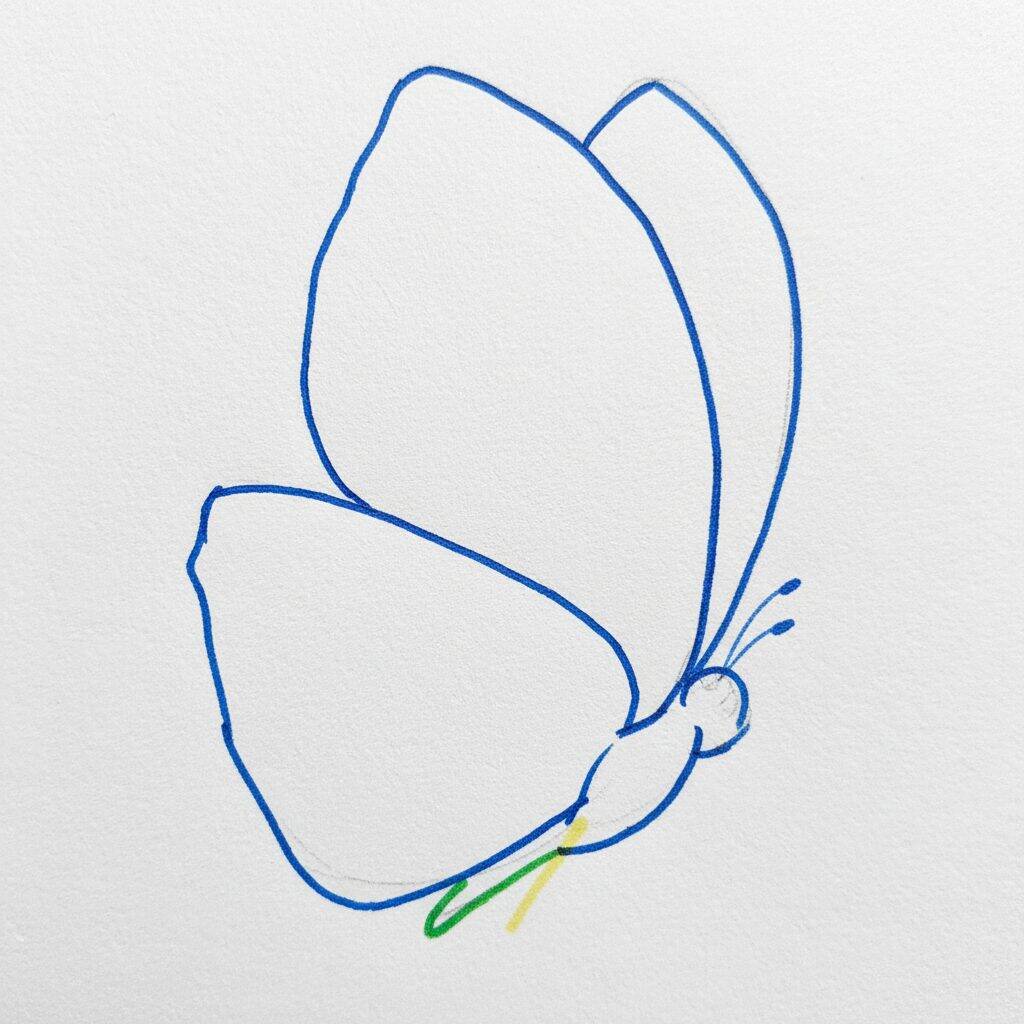
Step 1 of 4
To start drawing a realistic butterfly, start with the basic shapes of the wings. Draw two upper wings, which are wider and rounder, and two lower wings, which are smaller and more pointed. Use smooth, light lines so you can adjust the contours later. In the center, draw a small oval for the butterfly's body. These shapes will serve as the basis for the details that follow.
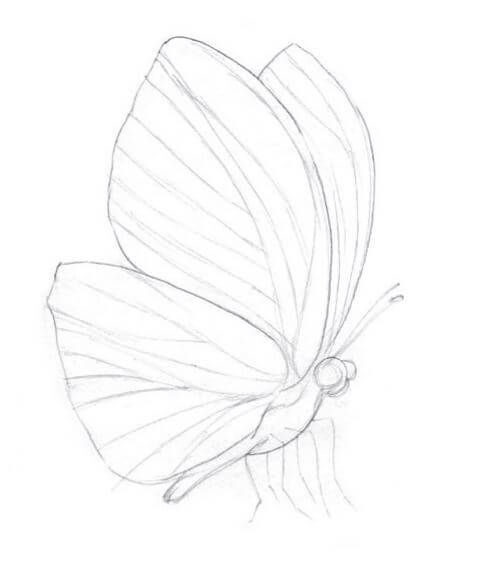
Step 2 of 4
Now, let's add details to the butterfly's wings. Start by drawing the vein lines that extend across the wings, creating a delicate pattern. Use soft, slightly darker lines to add depth. Then refine the butterfly's body by adding the head and antennae. Remember to keep the shapes light to make adjustments easier later. This will bring your drawing to life!
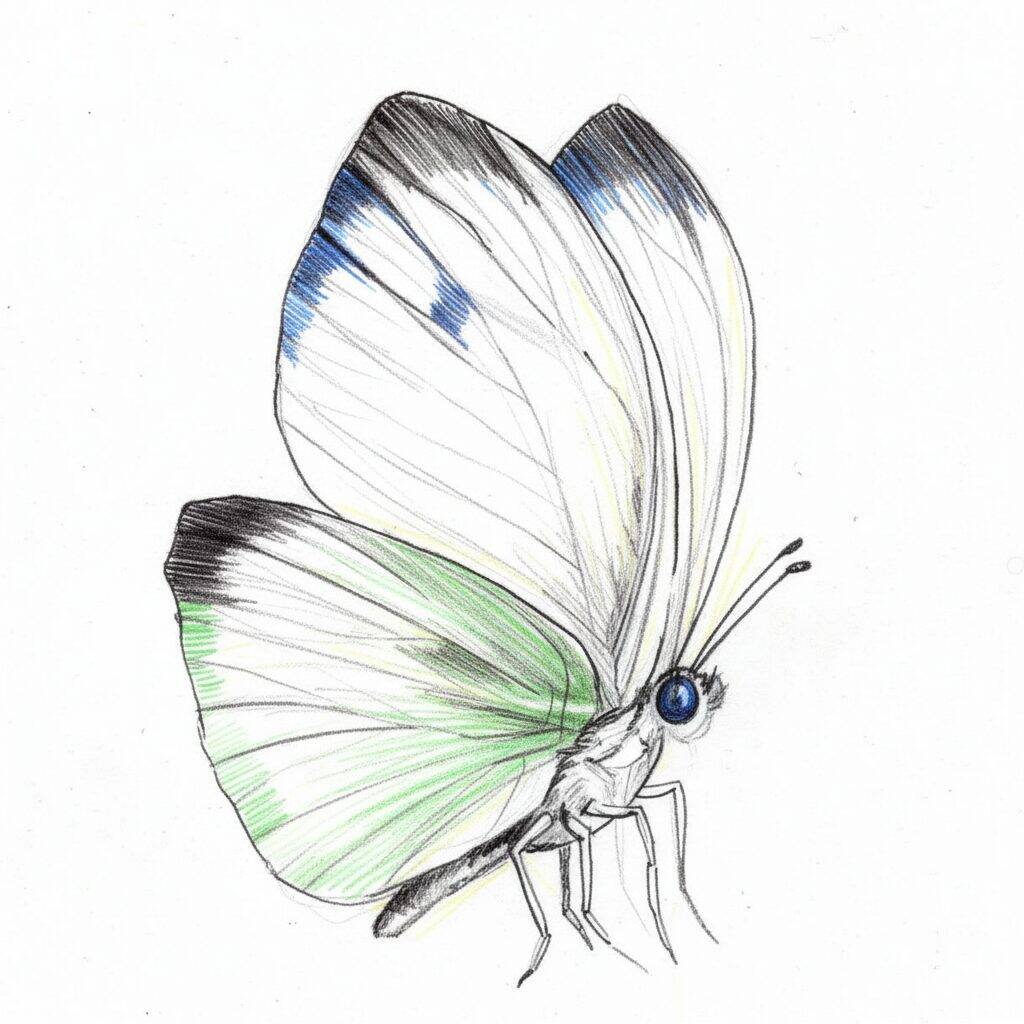
Step 3 of 4
Now that you've added the veins and refined the butterfly's body, it's time to add color to your drawing! Start by applying a soft base to the wings, using shades of blue and green. Mix colors to create a more realistic effect. Then, add shadows in areas where the light doesn't fall as much, such as the edges of the wings. This will help give your butterfly depth and dimension. Don't forget to leave some parts lighter to simulate shine!
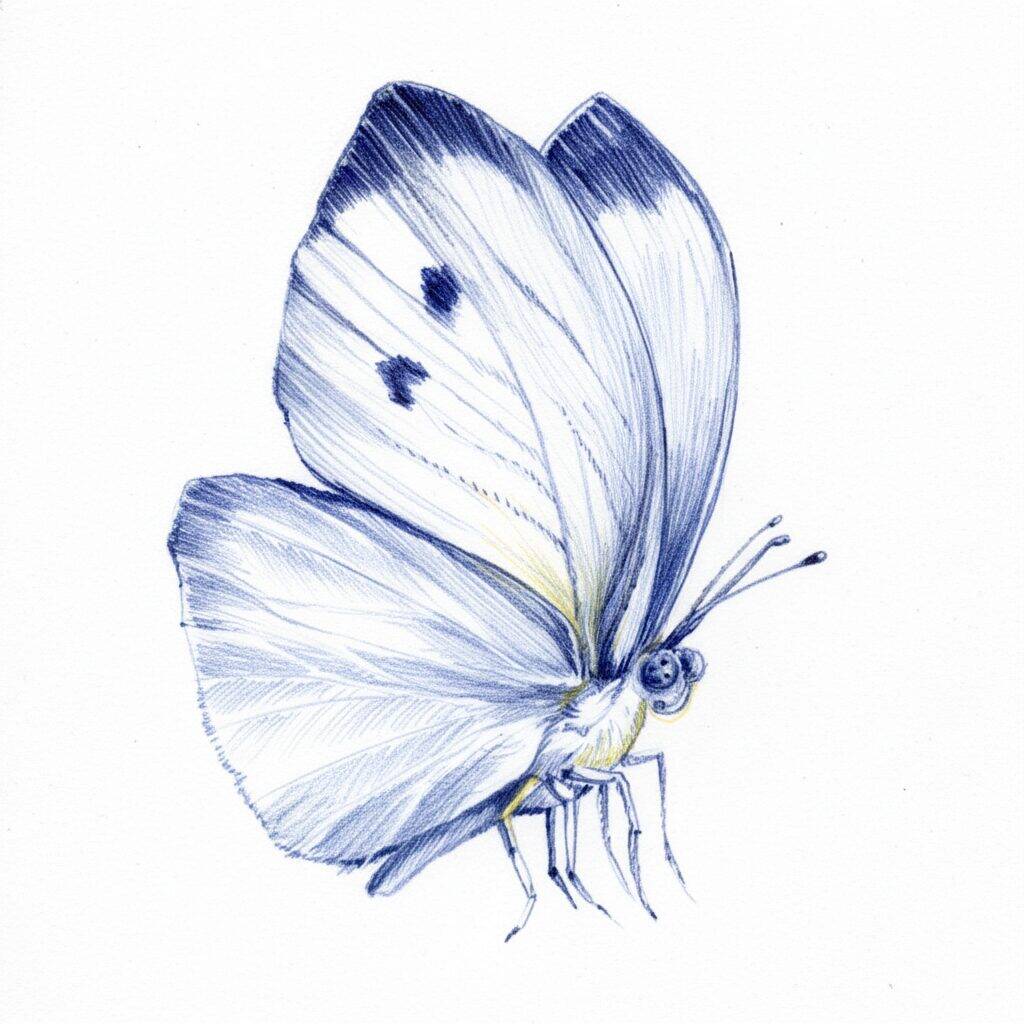
Step 4 of 4
Now that your butterfly is almost complete, it's time to add the finishing touches! Use a darker pencil or pen to reinforce the contours of the wings and body, highlighting the features you want to emphasize. Add small details like dots or lines to the wings to make them look even more realistic. Finally, review your work and make color adjustments if necessary to ensure everything looks harmonious. Congratulations on your beautiful butterfly!