


📐 How to Draw — Step by Step
Step 1 of 10
To start drawing a female face, draw an oval shape that will be the base of the face. Then draw a horizontal line and a vertical line that intersect in the center of the oval. These lines will help position the eyes, nose and mouth further forward. Make sure the bottom of the oval is a little wider as this will give the face a more natural shape.
Step 2 of 10
Now, let's refine the shape of the face. Start by adjusting the lines of the oval to create a more natural outline. The top should be slightly narrower, while the bottom can be gently rounded. This will give it a more organic look. Remember to keep the lines light, as we will still add details later.
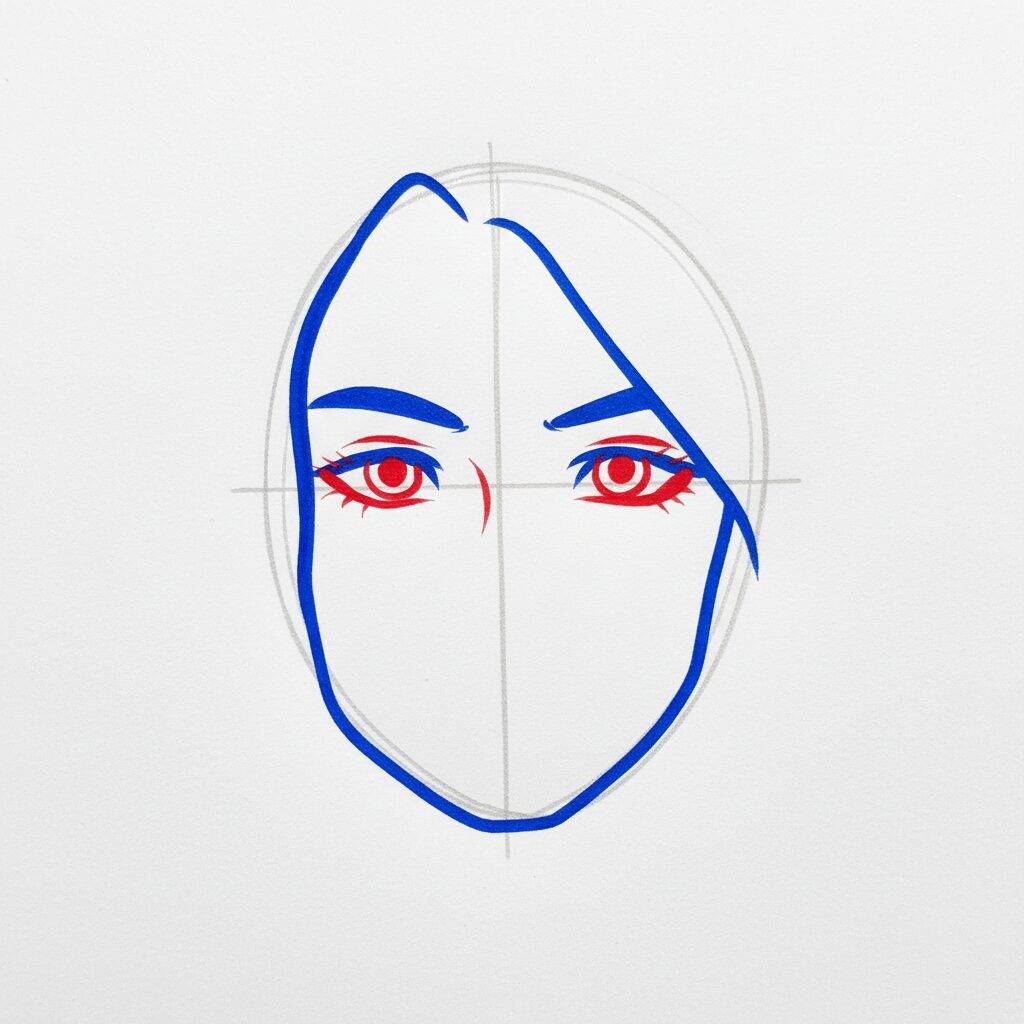
Step 3 of 10
Now, let's add the eyes and eyebrows to the face. Start by drawing two ovals for the eyes, positioning them symmetrically below the horizontal line you created earlier. Then, draw the eyebrows above the eyes, using a curved line that follows the natural shape of the face. Remember to keep the lines light so you can adjust later if necessary.
Step 4 of 10
Now, let's add details to the eyes. Start by drawing the pupils inside the ovals you made earlier. Then add the eyelids, drawing a soft line around the eyes to give depth. For the eyebrows, refine the shape you created by making them a little thicker and more defined. Remember to maintain symmetry between both sides of the face for a harmonious result.
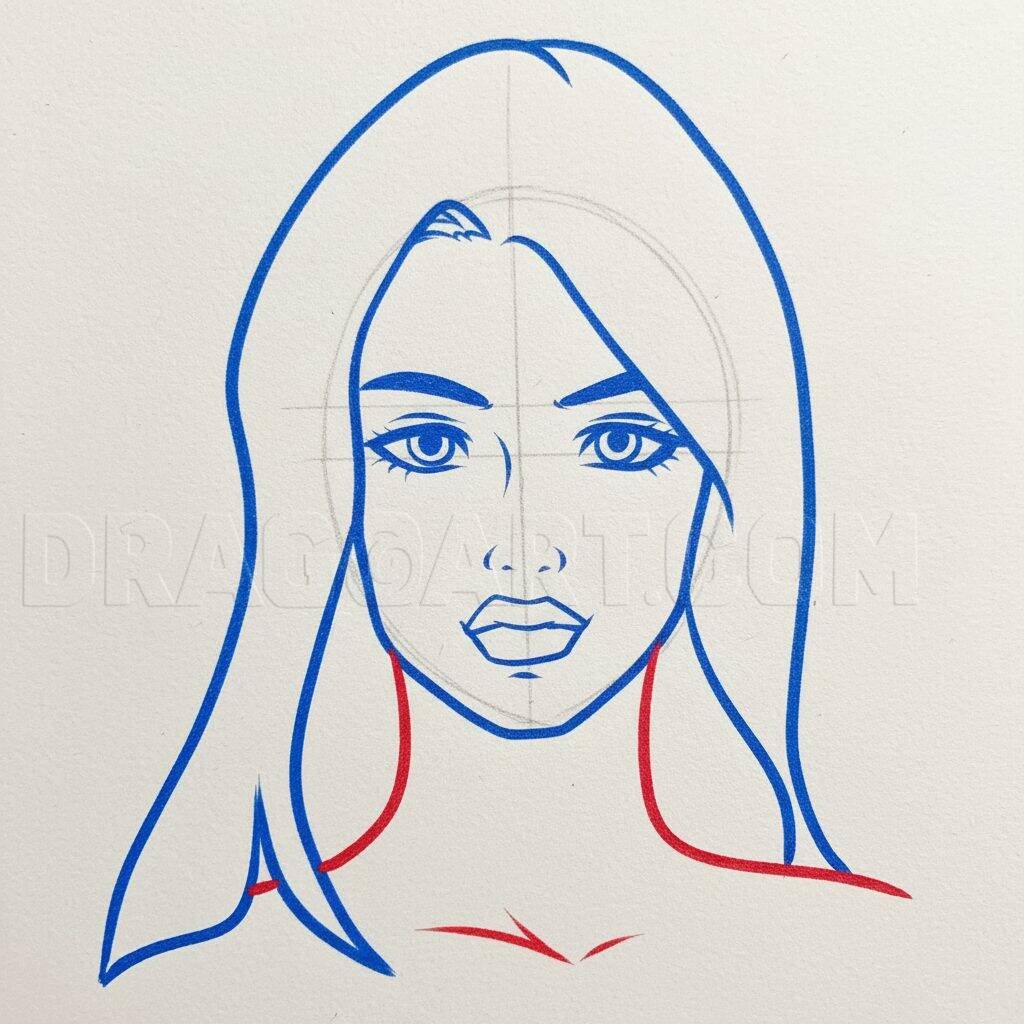
Step 5 of 10
Now that the eyes are ready, let's work on the mouth. Start by drawing a smooth line down the center of the face for the mouth. Then add the lip contours, starting with the top, which should have a slight curve. For the bottom, draw a similar line, but a little fuller. Remember that symmetry is important, so make sure both sides are balanced.
Step 6 of 10
Now that the mouth is drawn, let's add the hair. Start by drawing the outline of the locks, following the line of the head. Use soft, wavy lines to create a natural effect. Remember that hair can be layered, so don't hesitate to add a few strands that fall over your face. Finish the hair contour, ensuring it has a smooth, harmonious flow.
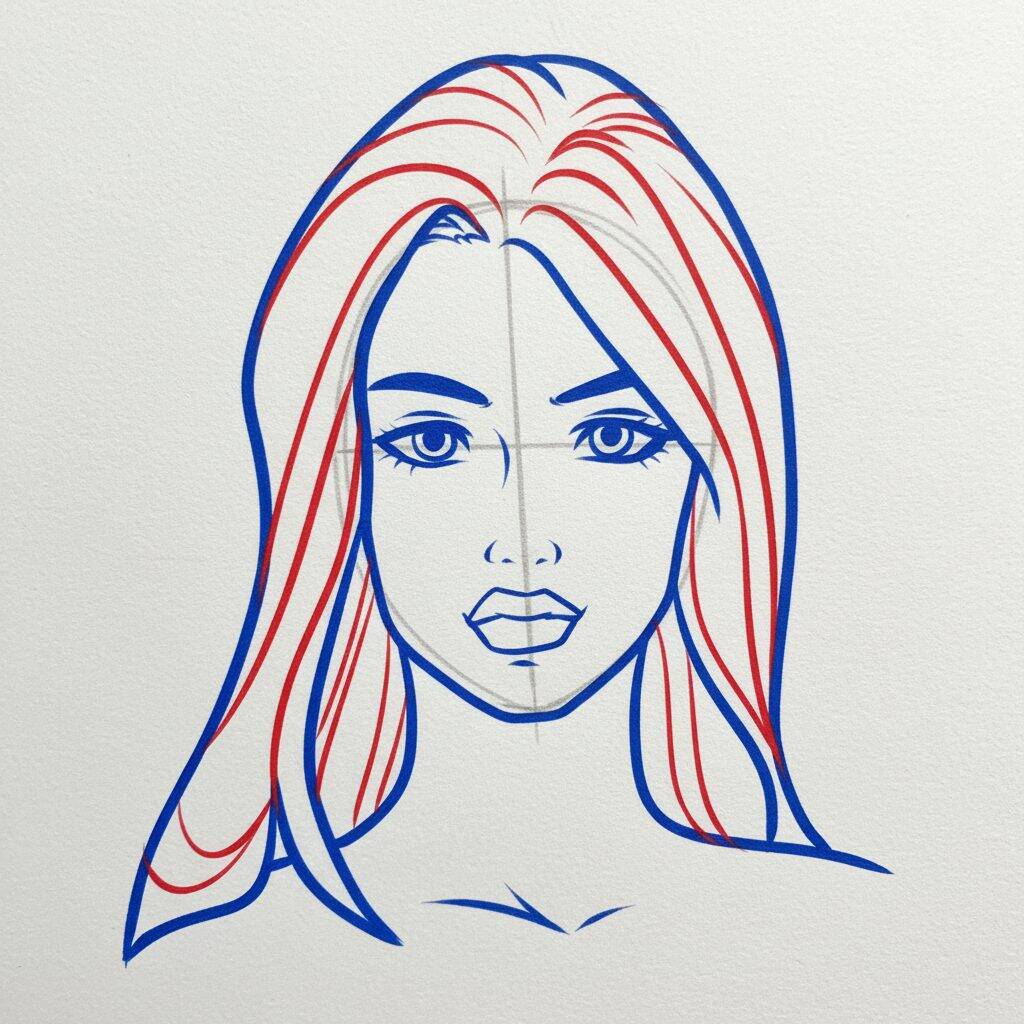
Step 7 of 10
Now that the hair outline is ready, let's go into even more detail. Start adding inner lines that represent the strands of hair, creating a sense of texture. Use gentle curves to follow the natural flow of your locks. Additionally, you can add some thinner lines at the edges to give it a more realistic touch. Don't forget to keep the overall shape of your hair harmonious and fluid!
Step 8 of 10
Now that you've added the hair highlights, it's time to refine the face. Start by drawing the eyebrows, which should follow the natural line above the eyes. Then, define the eyes better by adding the eyelids and irises. Remember that expression is important, so think about the emotion you want to convey. Finish the contour of the nose and mouth, ensuring that all proportions are balanced.
Step 9 of 10
Now that the face is more defined, it's time to add color and depth. Start by coloring your hair in shades of blue, using a pencil or pen that highlights the highlights you drew previously. For the eyes, choose a vibrant color for the irises and add a light shadow to the eyelids. Don't forget to add a touch of color to your lips and cheeks to bring your character to life. Finish with a little sparkle in the eyes for a more realistic effect!
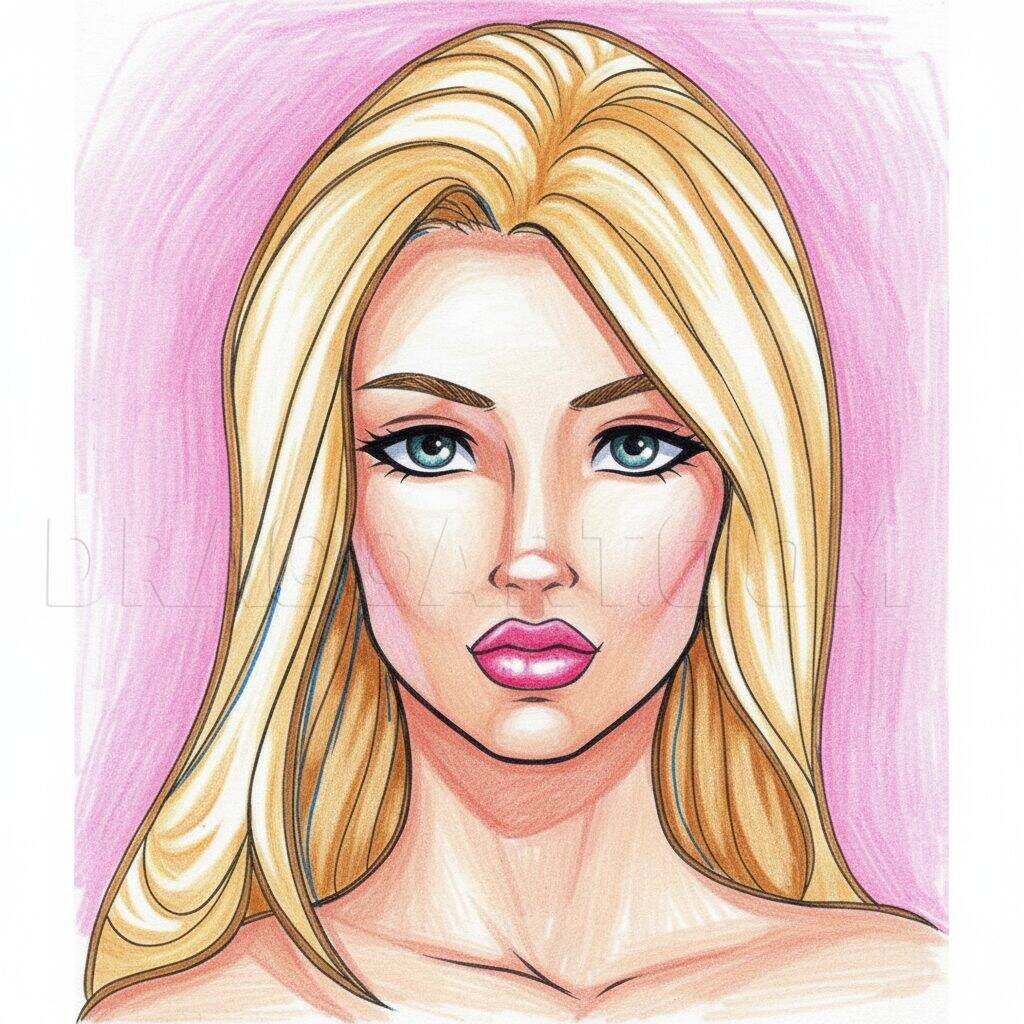
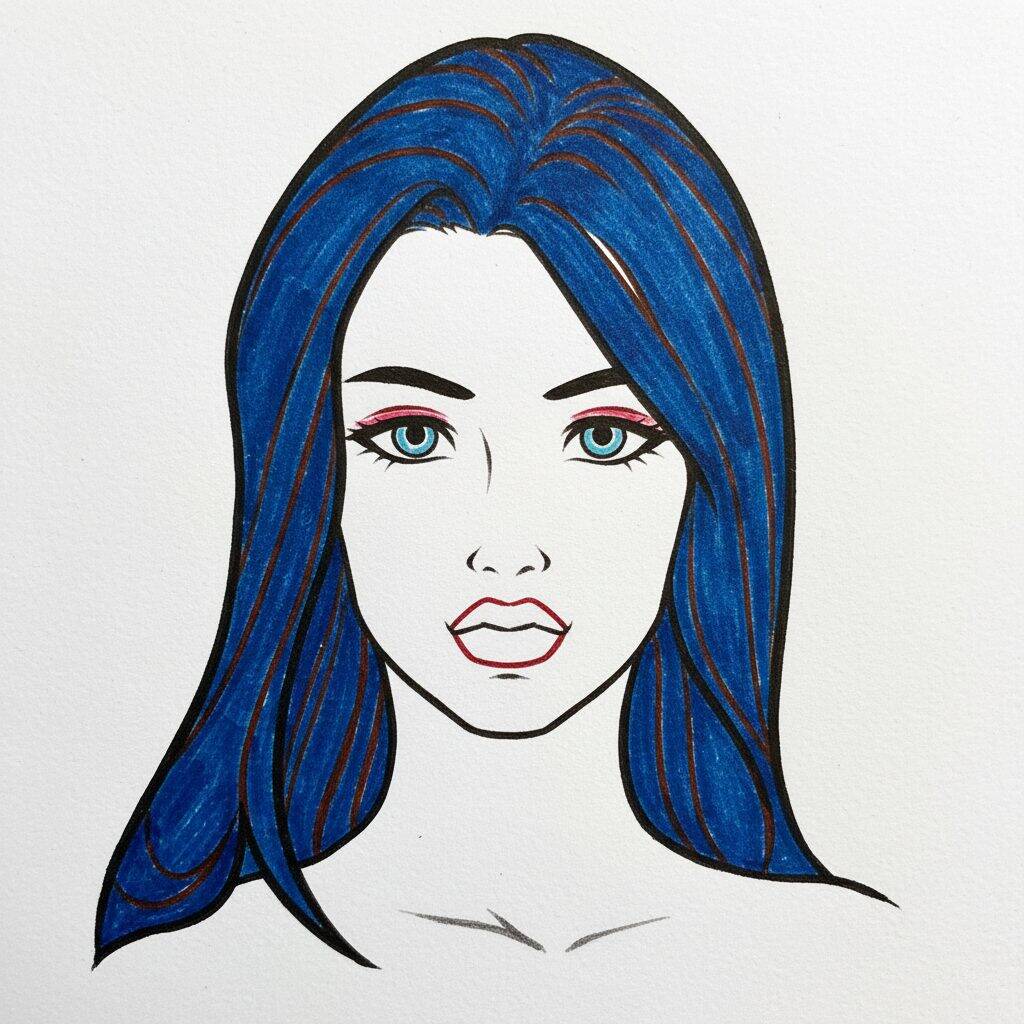
Step 10 of 10
Now that you've finished drawing the female face, it's time to bring your creation to life! Start by coloring your hair with shades of blue, highlighting the highlights you drew. For the eyes, choose a vibrant color for the irises and add subtle shadow to the lids. Don't forget to apply a touch of color to your lips and cheeks. Finally, add a sparkle to the eyes for a more realistic and impressive effect!