

📐 How to Draw — Step by Step
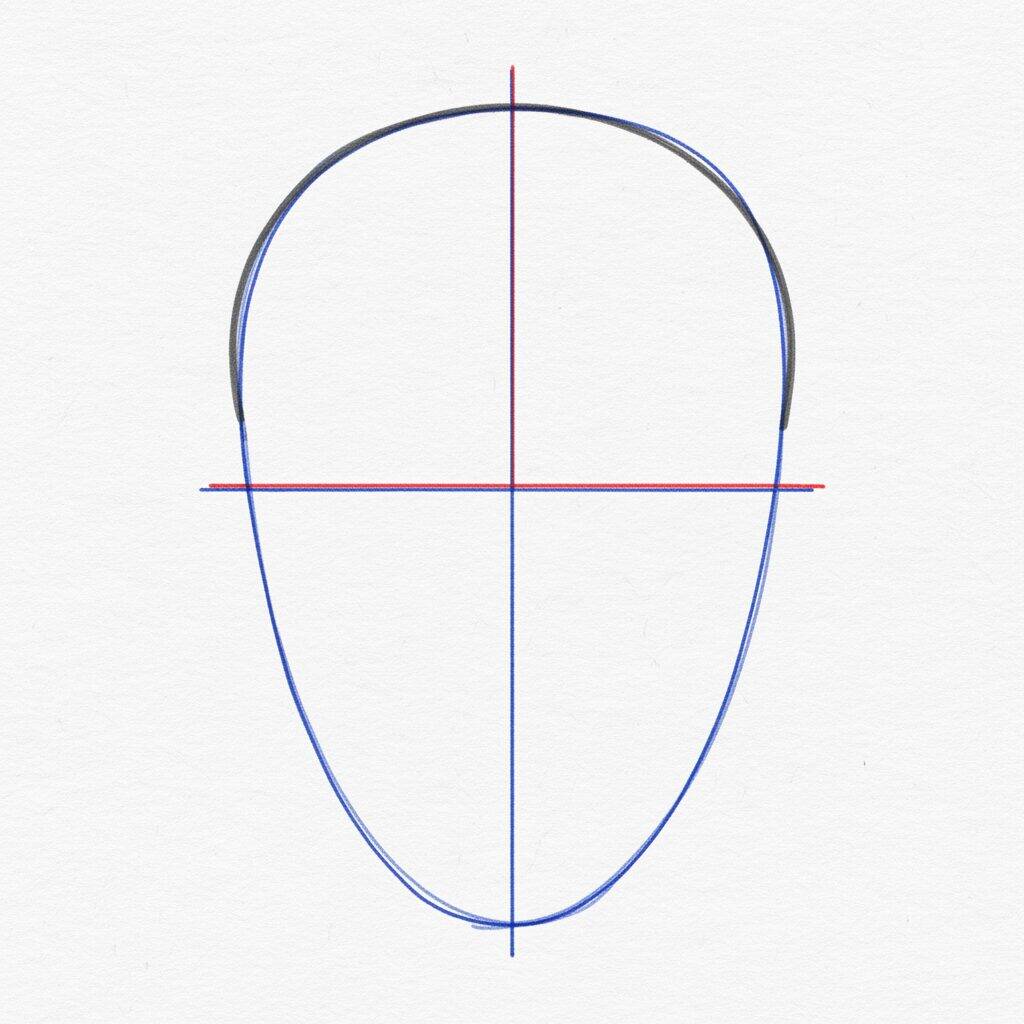
Step 1 of 6
To start drawing a realistic skull, draw an oval shape that will be the base of the skull. This shape should be a little wider at the top and taper at the bottom. Then draw a vertical line down the center and a horizontal line down the middle of the oval. These lines will serve as guides for positioning facial features later. Keep the lines soft and light as you can adjust them as you go.
Step 2 of 6
Now, let's add the facial details to your skull. Start by drawing the eye sockets, which should have a triangular shape, a little rounded at the top. Next, draw the nose in the shape of an inverted triangle just below the eyes. For the mouth, draw a curved line that extends from one side to the other, creating a slight expression. Remember to keep the lines light as you can still make adjustments.
Step 3 of 6
Now, let's work on the structure of the skull. Start defining the shape of the skull by softening the lines you've already drawn. Give the top a more rounded shape and slim the jawline. Next, draw the dental arches, creating small rectangles to represent the teeth. Remember to maintain symmetry, adjusting any details necessary to give your skull more realism.
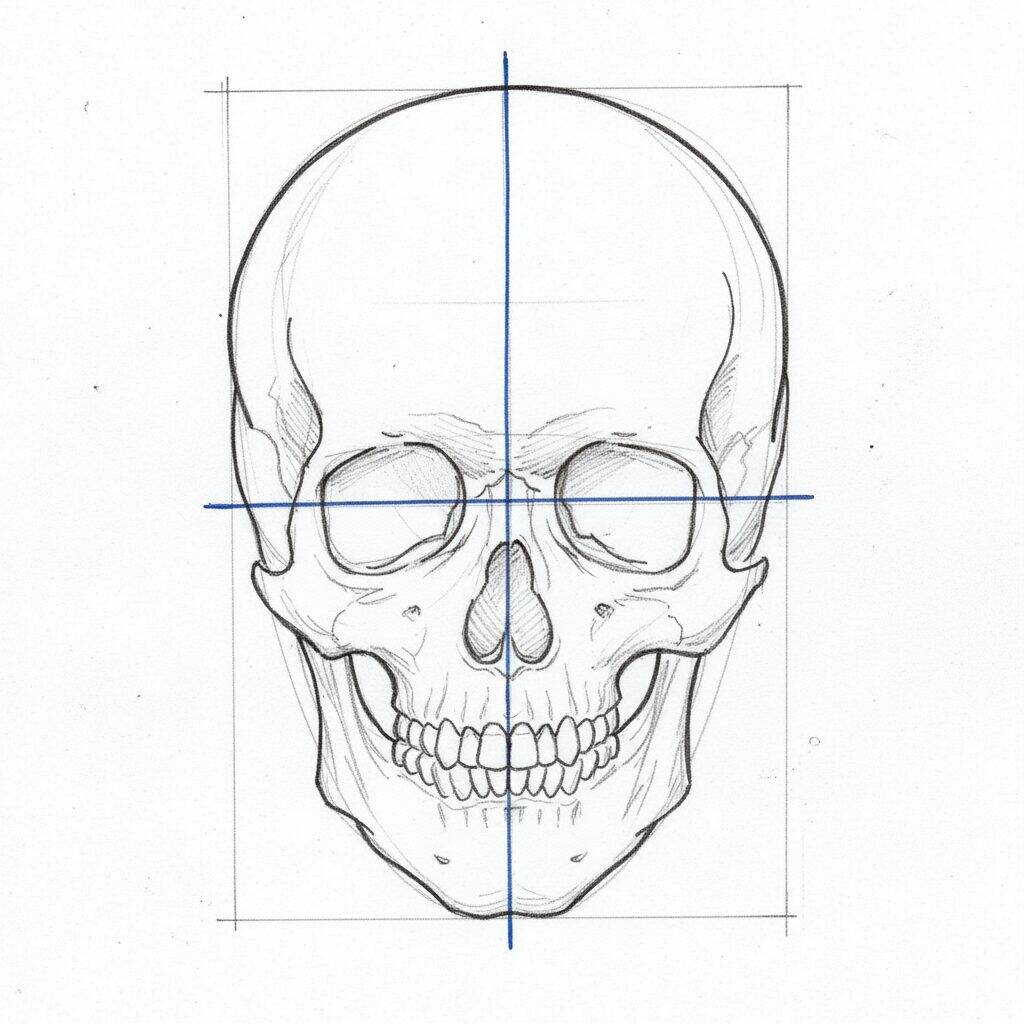
Step 4 of 6
Now that you've defined the skull's structure, it's time to add important details. Start by drawing the eye sockets, which should have an oval and slightly angular shape. Next, draw the nose, which resembles an inverted triangle, just below the eye sockets. For the mouth, highlight the contours of the teeth and the jaw line, ensuring that everything is well defined and symmetrical. This will bring more life to your skull!
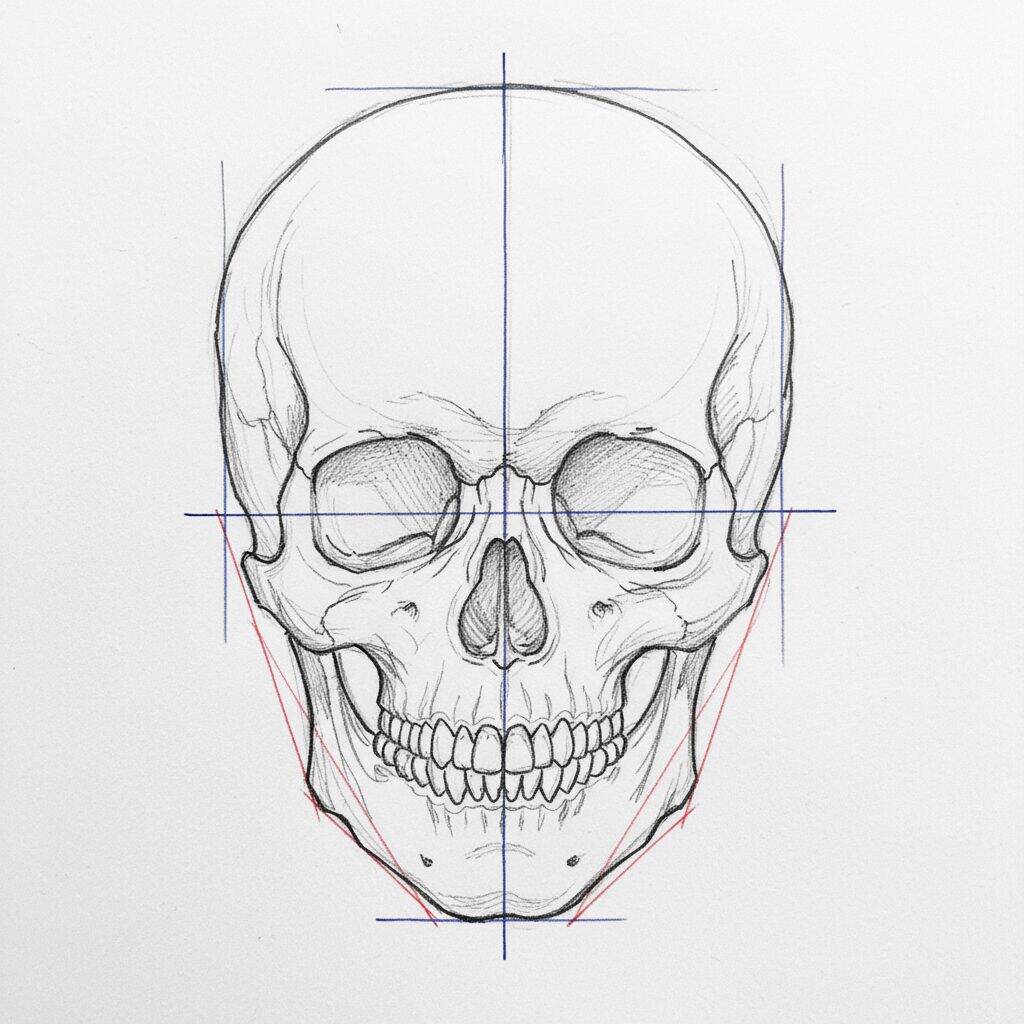
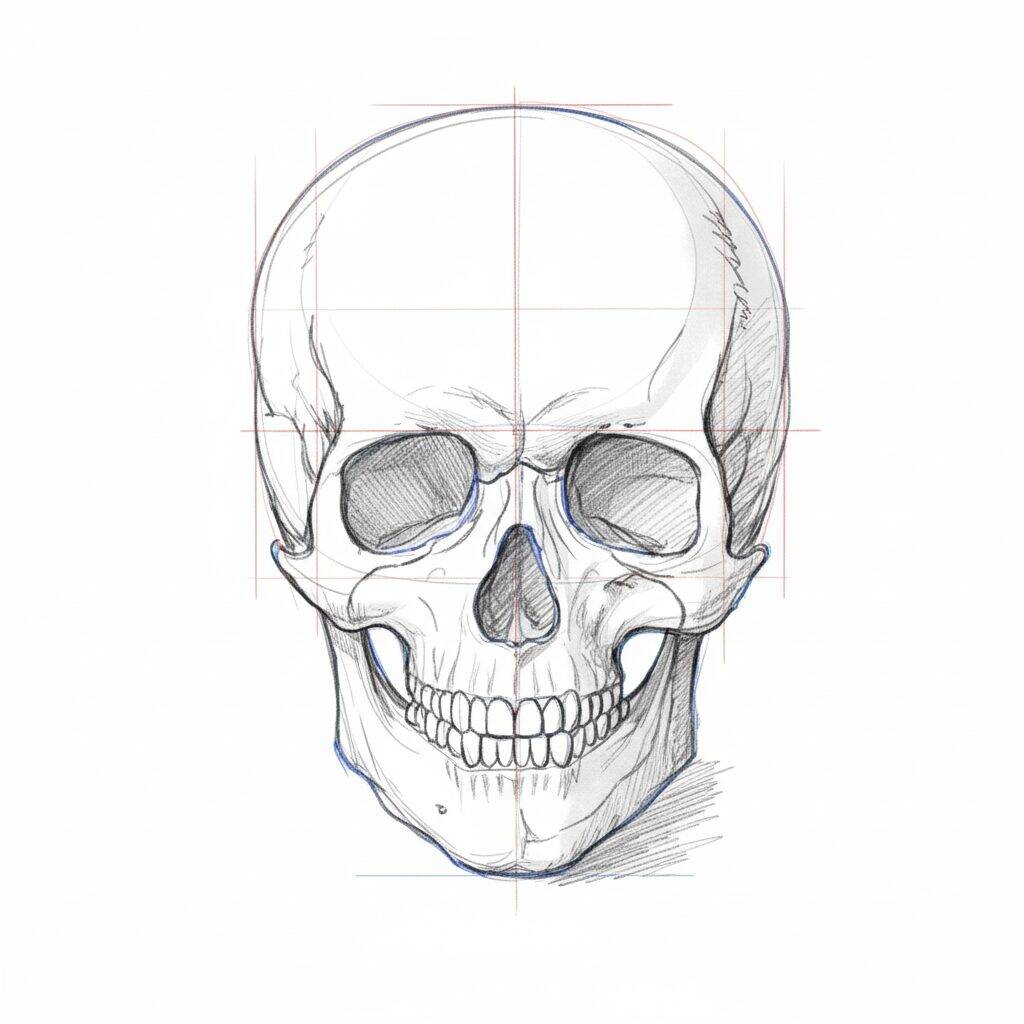
Step 5 of 6
Now that you've added the main details, it's time to refine your skull. Start shading in the eye sockets to give depth. Use a darker pencil to highlight the areas that are most shadowed, such as the sides of the nose and the cavities of the mouth. Add subtle textures to the skull, such as fine lines that mimic fissures. This will make your skull even more realistic and interesting!
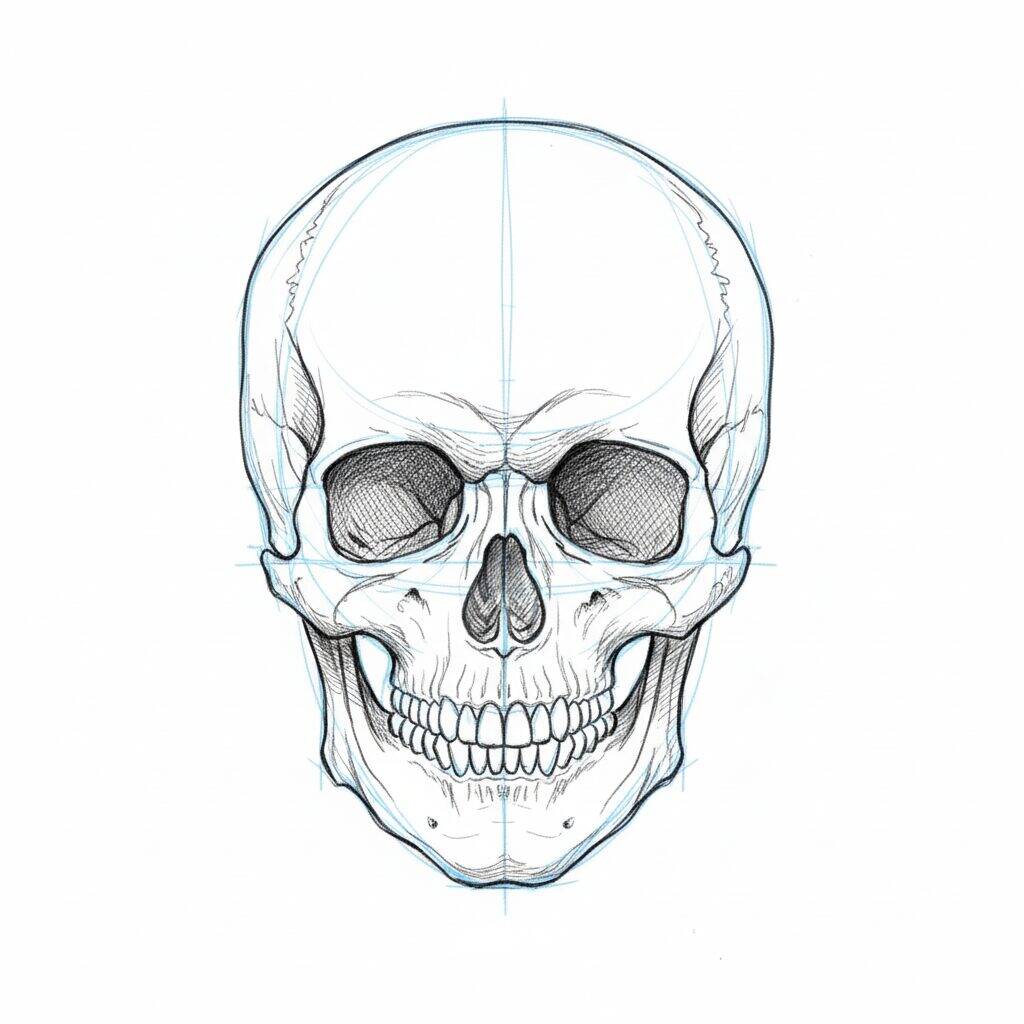
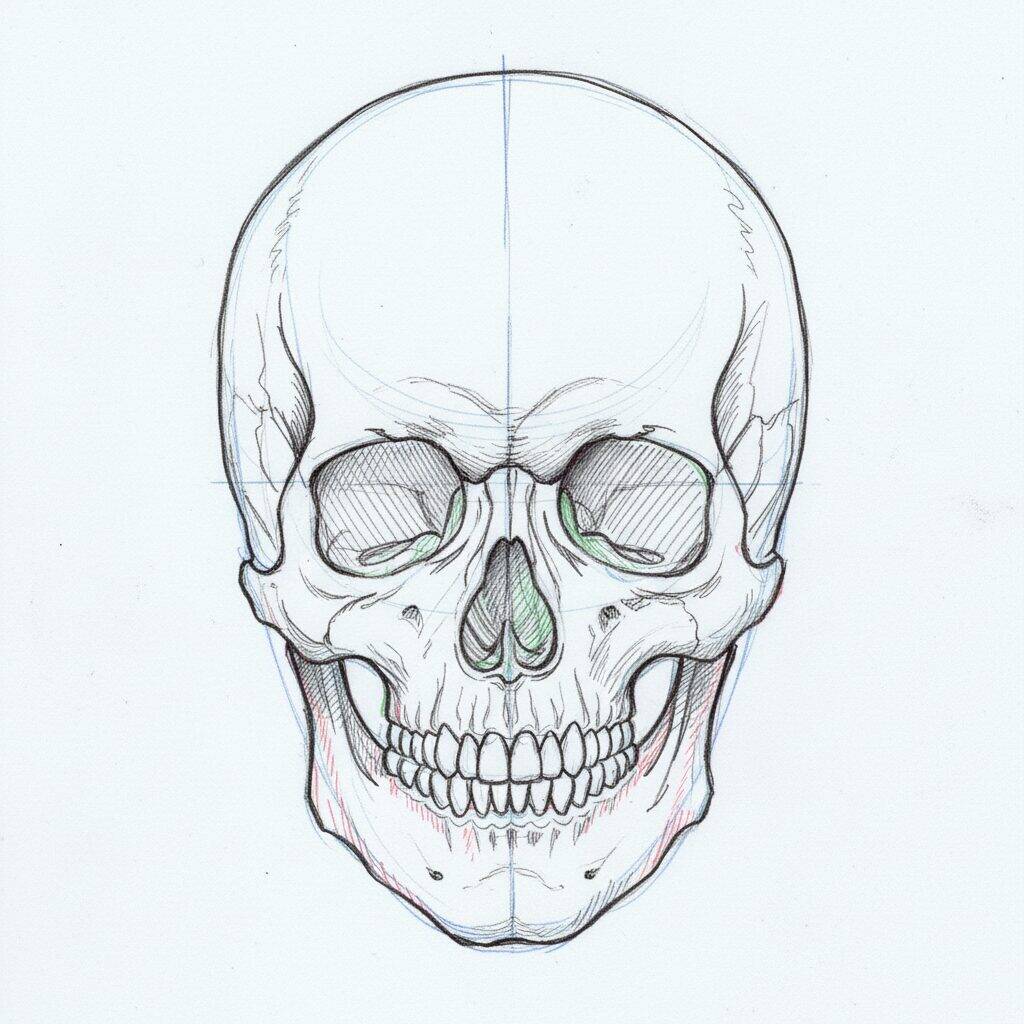
Step 6 of 6
Now that you've finalized the details and shading, it's time to add the finishing touches to your skull. Review the shadow areas, adjusting the intensity where necessary to create a stronger contrast. You can add a slight shine to smooth surfaces to simulate reflections. Finally, clean up any guide lines that are still visible and admire your work! Your realistic skull is ready!