
📐 How to Draw — Step by Step
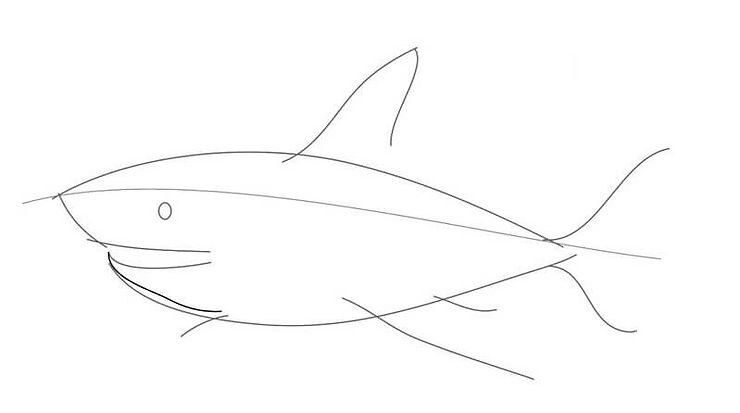
Step 1 of 5
To start drawing a realistic shark, start by creating basic shapes. Draw a large oval for the shark's body, tilting it slightly to give it movement. Then add a triangle at the top for the dorsal fin and a more tapered shape at the back for the tail. Don't forget to draw a curved line for the mouth and a small circle for the eye. These forms will serve as the basis for the next steps.
Step 2 of 5
Now, let's refine the shark's body. Start outlining the basic shapes you drew earlier, giving the body more definition. Add details like the lines of the fins, making them more angular and realistic. For the mouth, draw the visible teeth and a curved line that suggests the opening of the jaw. Don't forget to jazz up the eye by adding a pupil and a sparkle. This will bring your shark to life!
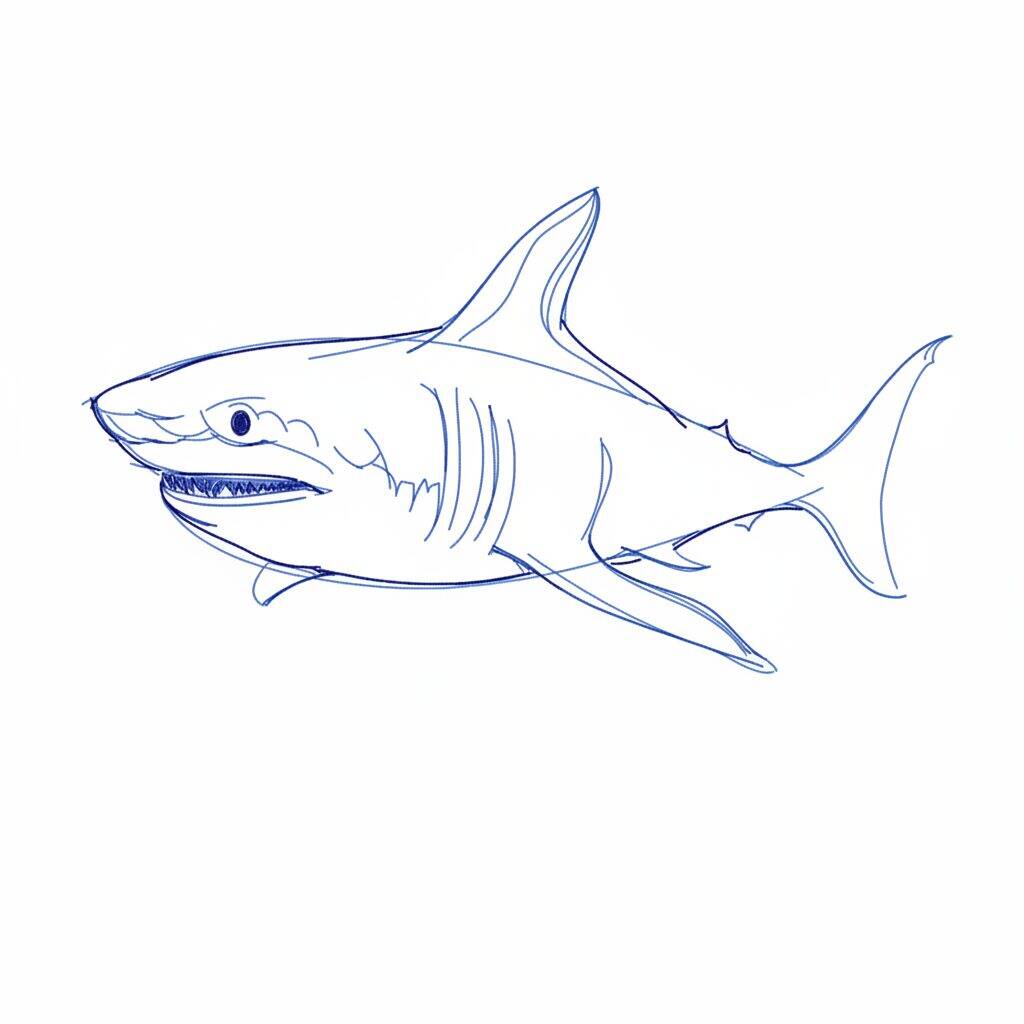
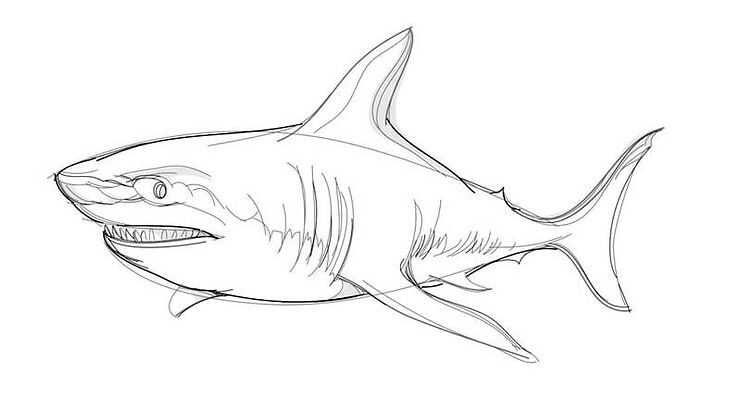
Step 3 of 5
Now, let's add more details to your shark. Start defining the scales by drawing curved lines along the body to give texture. Then refine the fins, making them more dynamic and natural. For the mouth, add more teeth, varying their size for a more realistic effect. Finally, draw the shark's belly line, which should be a little lighter and smoother. This will help add depth to your drawing!
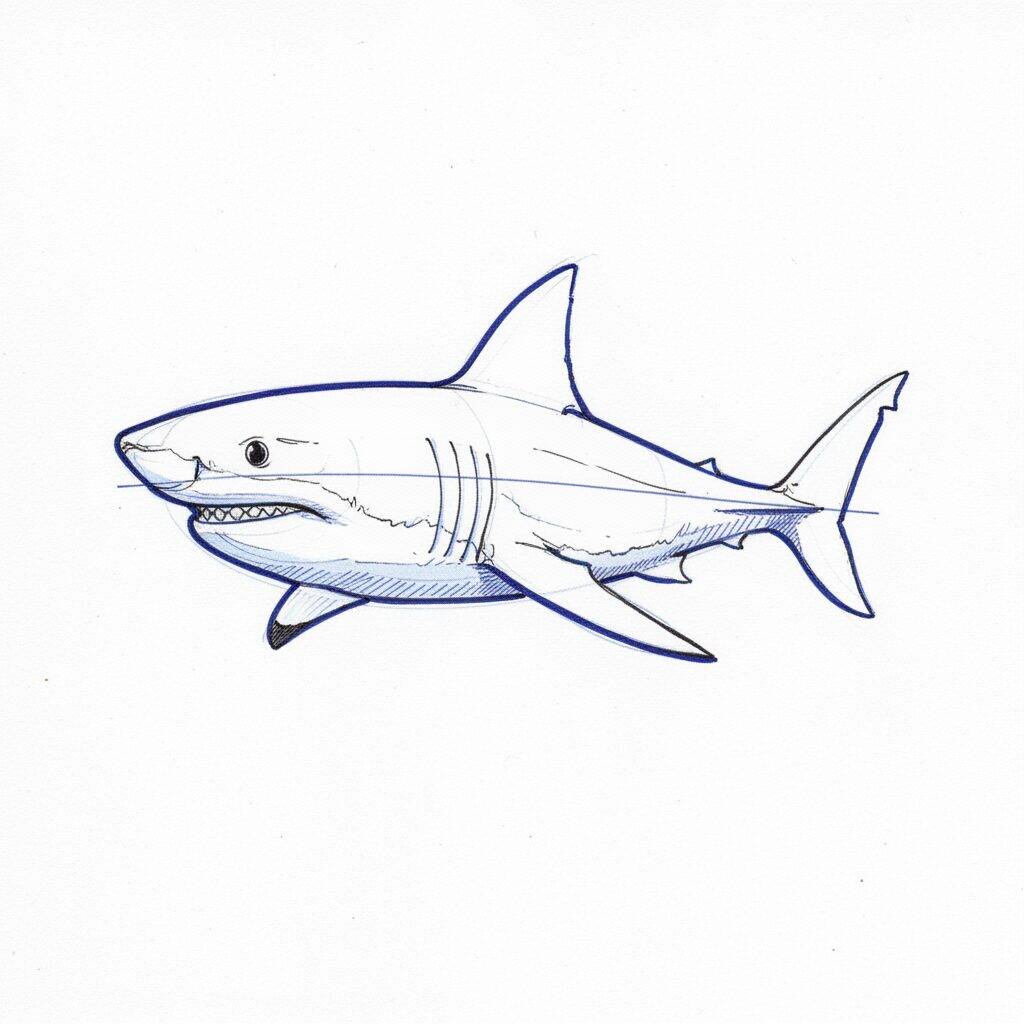
Step 4 of 5
Now that you've added the details to your shark, it's time to work on the shadows and highlights. Start shading the areas of the body that are closest to the bottom, using soft lines to create an effect of depth. In areas that receive the most light, such as the top of the head and fins, add a little white or a lighter tone to highlight these parts. This will add more realism and dimension to your drawing!
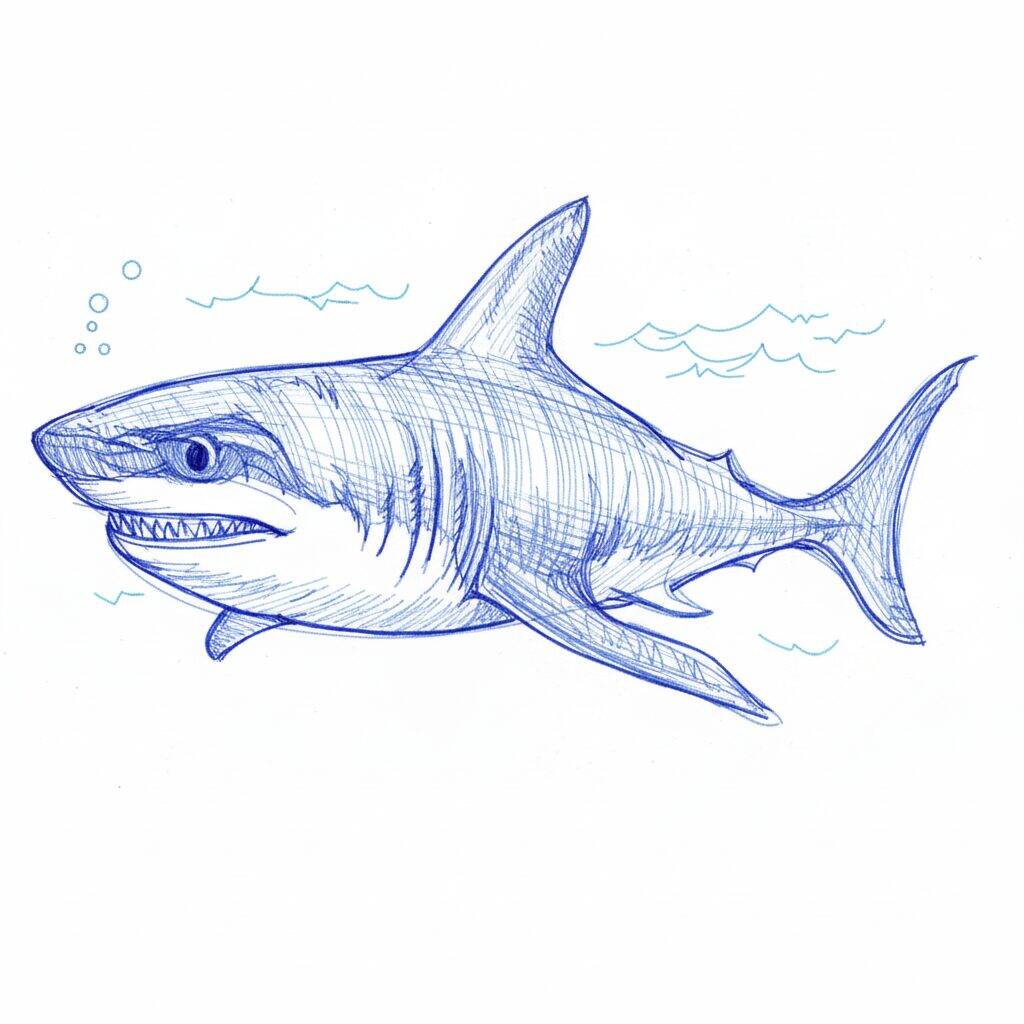
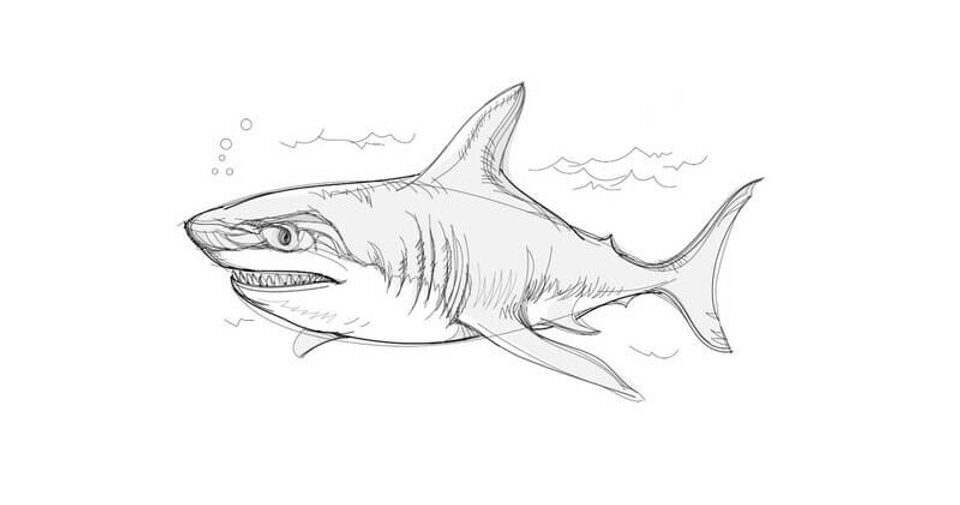
Step 5 of 5
Now that you've finished drawing your shark, it's time to add the finishing touches. Use a darker pencil or pen to reinforce the main lines of the drawing, highlighting the contours. If desired, add some water bubbles around it to give it a feeling of movement. Finally, review the details and adjust any parts that need more definition, ensuring your shark is ready to shine!