


📐 How to Draw — Step by Step
Step 1 of 9
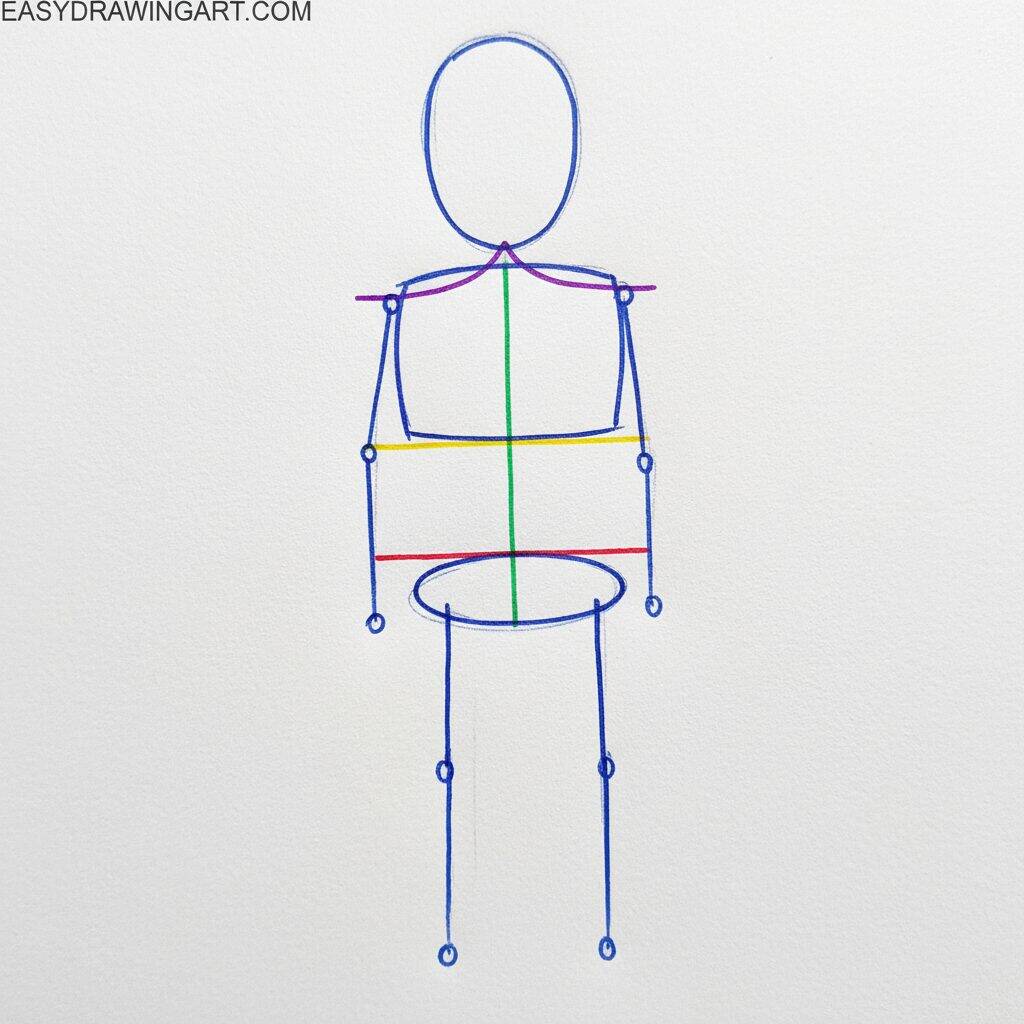
To start drawing a child, start by sketching the basic structure of the body. Draw a circle for the head, followed by an oval at the bottom for the torso. Then create two vertical lines for the arms and two straight lines for the legs. Use horizontal lines to connect the shoulders and waist, forming a base for the figure. This will help guide the drawing in the next steps.
Step 2 of 9
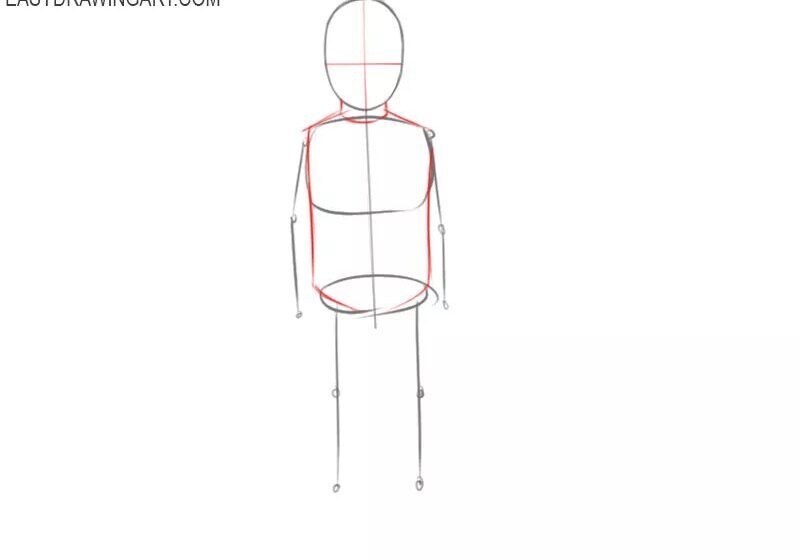
Now that you have the basic structure, let's add more details to the child's body. Start by defining the shape of the head, smoothing out the circle you drew earlier. Then, draw the features of the face, such as the eyes, nose and mouth, positioning them in a balanced way. For the torso, refine the oval shape, creating a more natural silhouette. Remember that the child is small and the waist should be narrower.
Step 3 of 9
Now that you've defined the head and torso, let's work on the arms. Start by drawing the basic shapes of the arms, using cylinders to represent the muscles and joints. Hands can be drawn as simple shapes, such as small circles or ovals, that connect to the wrists. Remember that the arms must be proportional to the child's body, so maintain the appropriate thickness and length.
Step 4 of 9
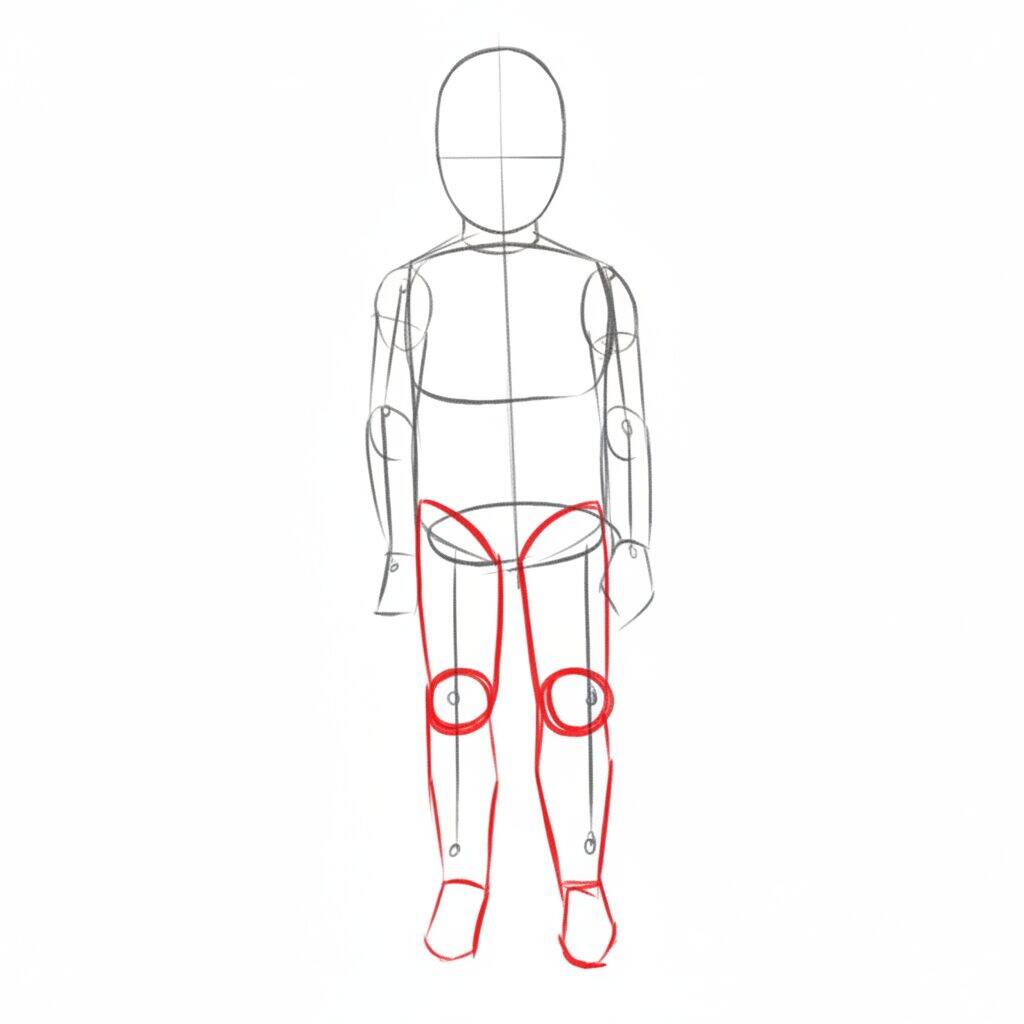
Now that you've drawn the arms, it's time to add the legs. Start by drawing the basic shapes of the legs, using cylinders again to represent the muscles and joints. Draw a smooth outline for the knees, which can be represented as circles. The legs should be in proportion to the body, so adjust the length and thickness as needed. Don't forget to draw the feet as simple shapes, connecting them to the legs.
Step 5 of 9
Now that you've added the legs, let's work on the child's face. Start by drawing a circle for the head, then add guidelines for the eyes, nose, and mouth. Place the eyes just below the center of the circle, and draw small ovals to represent them. Add a simple nose just below the eyes and draw a curved line for the mouth, giving a slight smile. Don't forget to leave room for the ears on each side of the head.
Step 6 of 9
Now that the face is ready, let's add more details to the child's body. Start by drawing the arms, connecting them to the torso with rounded shapes. Make the hands into simple shapes, such as small circles or ovals. Then refine the lines of the torso, giving the shoulders and chest a little more shape. Remember to maintain proportion and symmetry as you go.
Step 7 of 9
Now that the arms and torso are drawn, let's focus on the child's legs. Start by drawing two long, slightly rounded shapes to represent the thighs. Then add similar shapes to the calves, connecting them with smooth lines. Don't forget to create the knees as little curves. Finally, draw the feet, which can be simple ovals at the base of the legs. Keep the proportion so that everything is harmonious.
Step 8 of 9
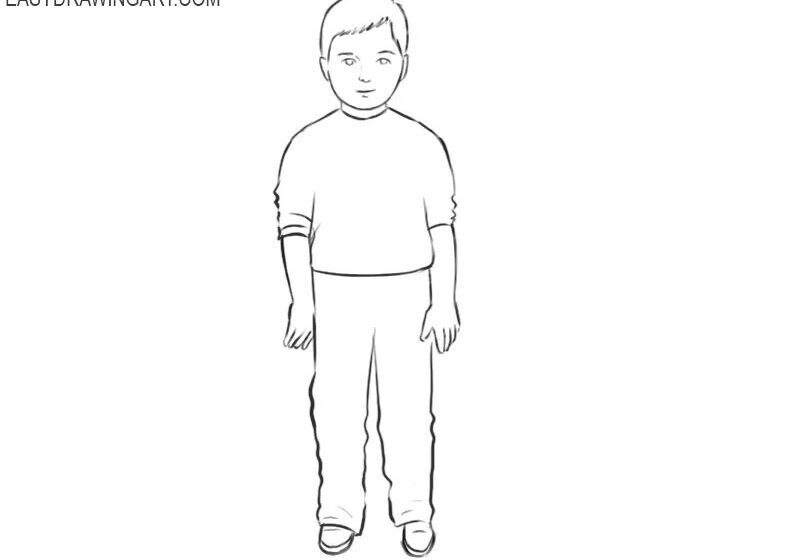
Now that you've refined the child's body, let's focus on the clothes. Start by drawing the outline of the shirt, ensuring it has a natural fit. Use soft lines for the sleeves and add some volume at the bottom. Then, draw the outline of the pants, remembering to include details such as the knees and pockets. This will give your drawing a realistic touch!
Step 9 of 9
Now that you've finalized the clothes, it's time to put the finishing touches on your child's drawing. Start by adding details to the face, such as the eyes, a soft smile, and eyebrows. Then, refine your fingers, ensuring they look natural. Finally, review the entire drawing, erasing unnecessary lines and adding light shading to give it more depth. Ready! Your child drawing is complete!