


📐 How to Draw — Step by Step
Step 1 of 10
To start drawing Goku, let's focus on his eyes, which are quite expressive. Draw two slanted ovals, which will represent the bases of the eyebrows. Then, add curved lines to form the contours of the eyelids and create an effect of intensity, leaving the edges a little thicker. Finally, draw the eyes inside the eyelids, giving a touch of determination to their look.
Step 2 of 10
Now that we have Goku's eyes ready, let's work on the shape of his face. Start by drawing a slightly curved line that extends from one side to the other, just below the eyes. Then, add the sides of the face, creating a shape that is wider at the top and tapers to the chin. Don't forget to give a slight angle to the sides to capture the essence of the character's style.
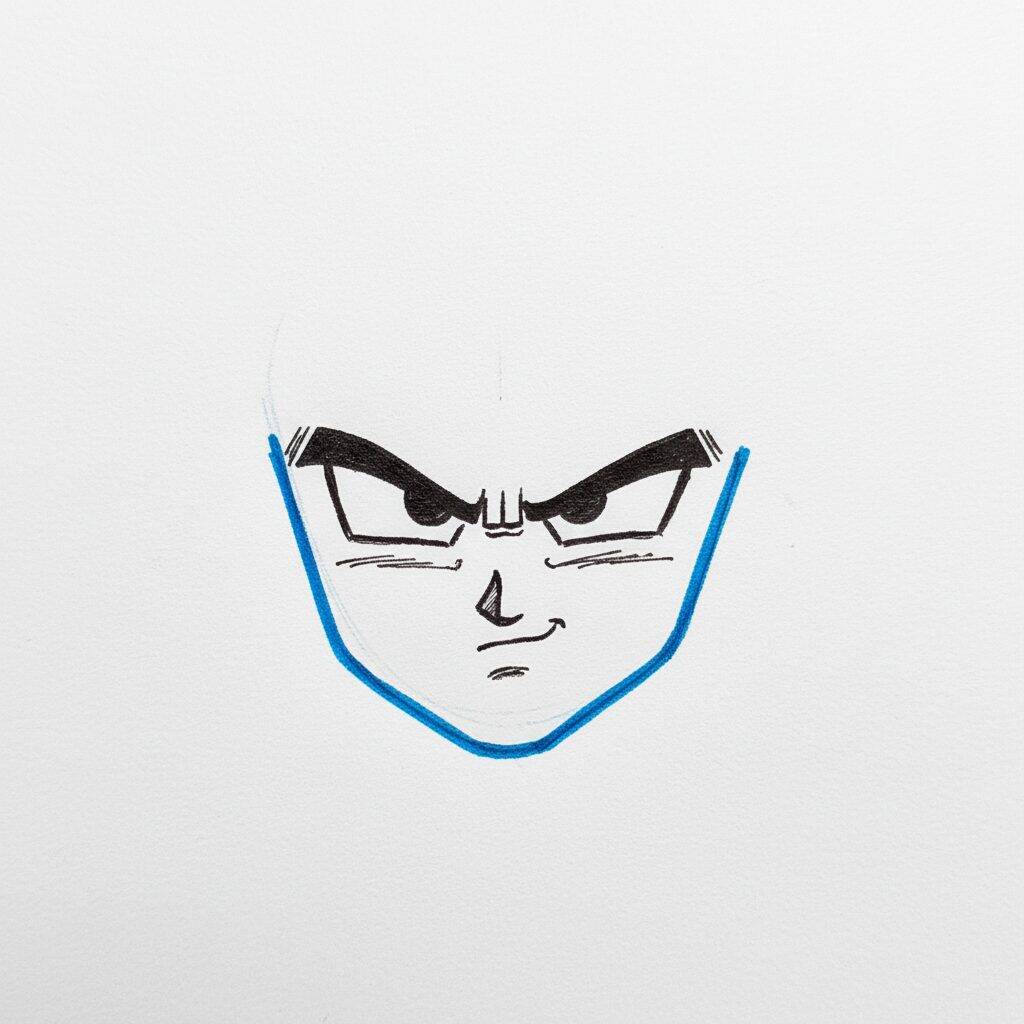
Step 3 of 10
Now that we have the basic shape of Goku's face, let's add the facial expression details. Start by drawing the eyebrows, which should be thick and slightly angled downwards, giving a determined look. Next, refine your jawline so it's more defined. To finish, add a soft smile line, capturing the character's confident essence.
Step 4 of 10
Now let's add Goku's ears! Start by drawing an oval shape on each side of the head, aligning them with the lower part of the face. Make sure the ears are a little wider at the bottom. Then, add details like the inner lines of the ears to give it more realism. Remember that Goku's ears have a distinct shape, so pay close attention to the proportion in relation to his face.
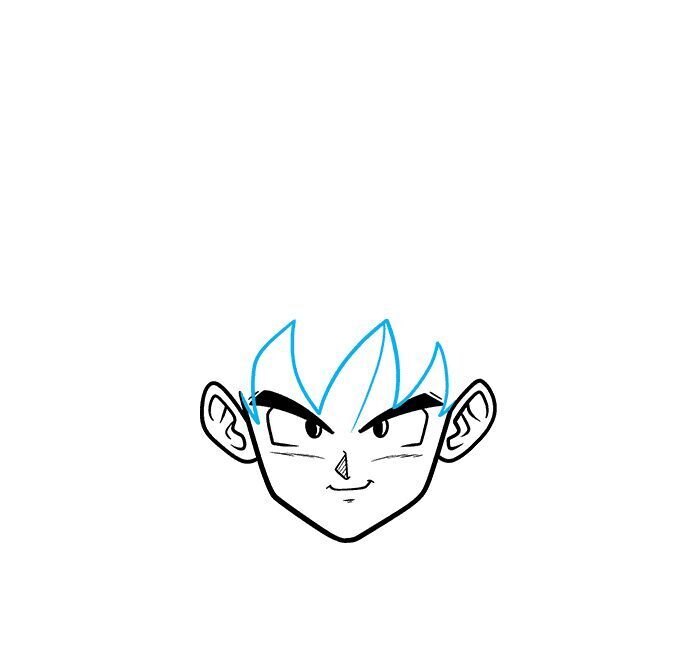
Step 5 of 10
Now that Goku's ears are drawn, let's add the hair! Start by sketching out sections of hair with angled lines that extend from the top of the head. Make some ends longer and others shorter, creating a dynamic look. Remember that Goku's hair is voluminous and has a characteristic shape, so don't hesitate to exaggerate the highlights a little.
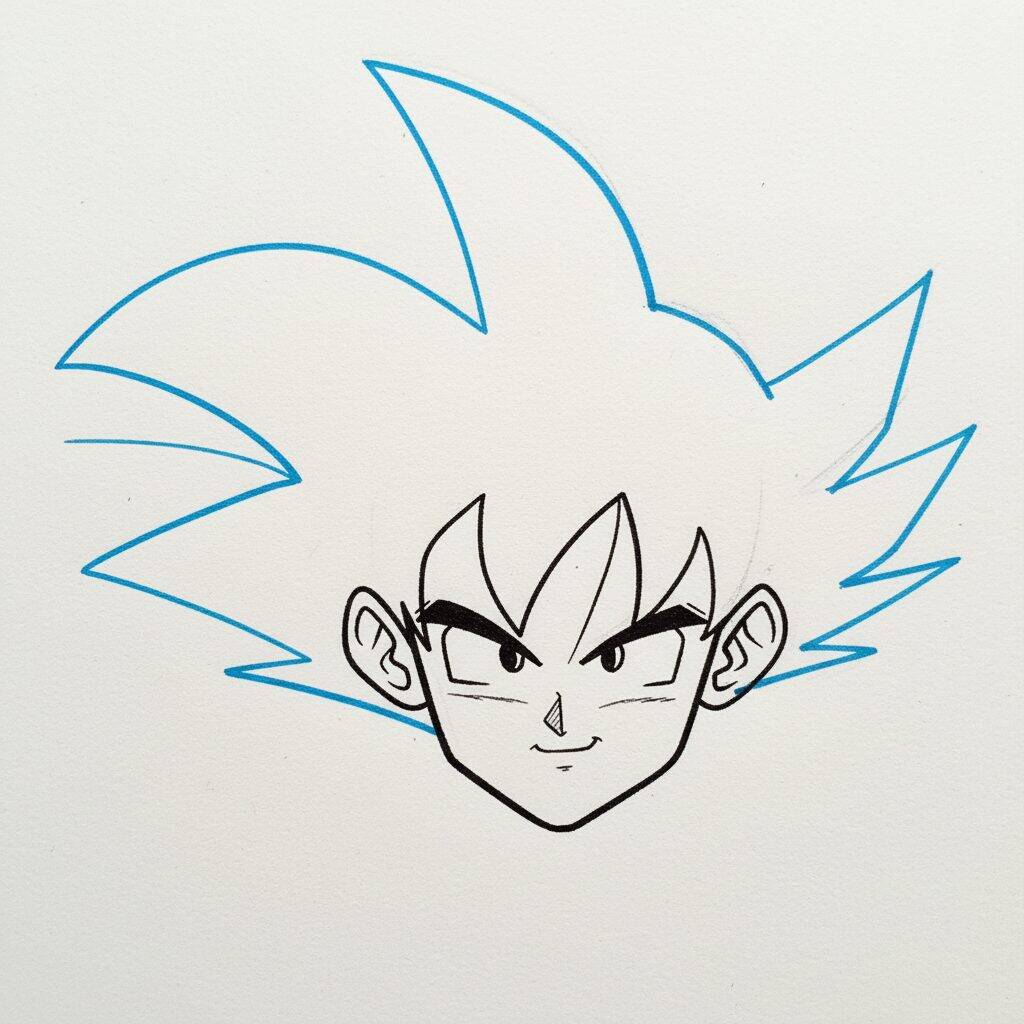
Step 6 of 10
Now that you've sketched out the hair strands, it's time to better define the contours. Use a marker or pen to trace the hairlines, making them sharper and more defined. Pay special attention to the ends of the locks, accentuating the characteristic shape of Goku's hair. Then refine the face, adding details such as the eyes, eyebrows and mouth, ensuring that the expression is well defined.
Step 7 of 10
Now that you've defined the contours of the hair and face, it's time to add the final details. Start drawing the facial features, such as the eyes, which should be expressive and slightly angled. Next, add the eyebrows, which should be thick and well defined, and draw the mouth with a slight curve to show Goku's expression. Don't forget to highlight the hair lines to give the design more volume and dynamism.
Step 8 of 10
Now that you've sketched out the facial features, let's work on the hair. Start defining the highlights, adding more details and texture. Remember that Goku's hair is very voluminous and has angular ends. Use short, dynamic strokes to represent movement. After that, refine the neck line and add a light contour to the t-shirt collar. This will help give your drawing a solid foundation.
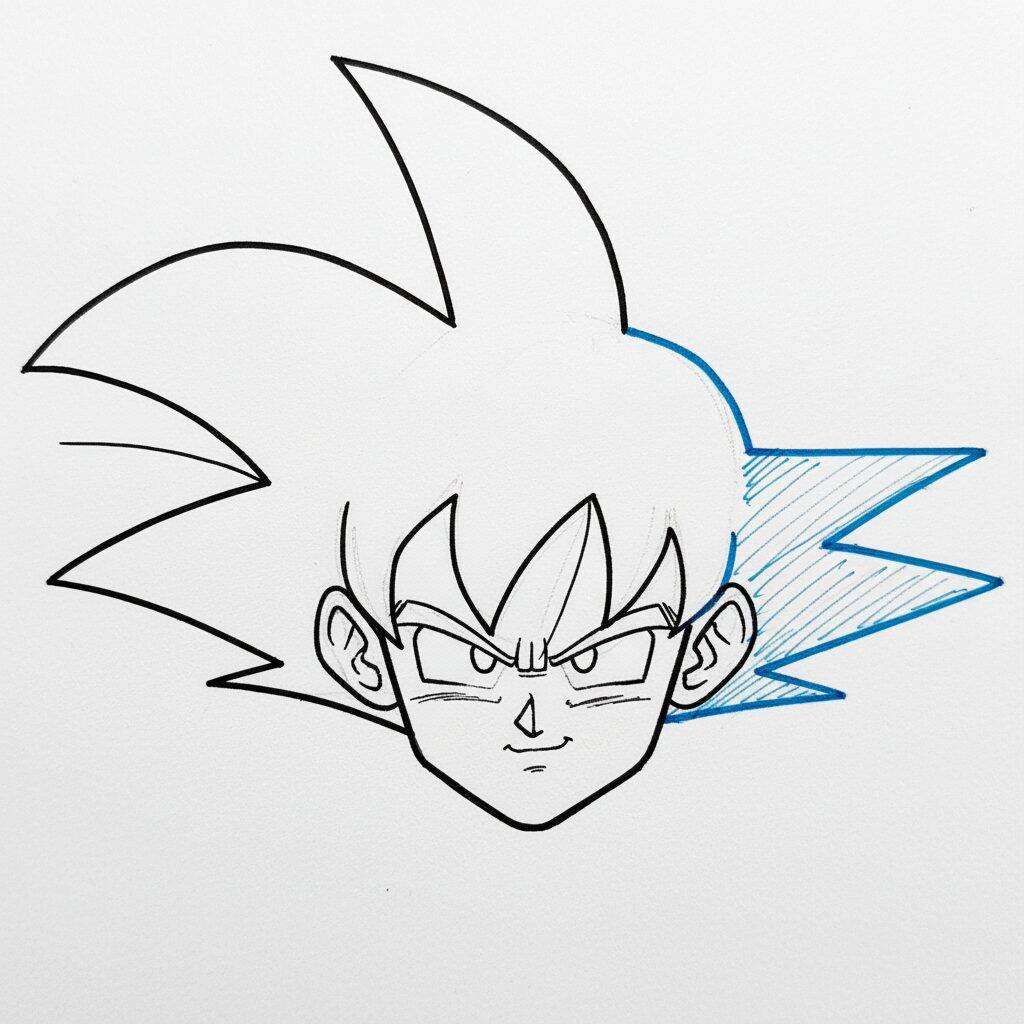
Step 9 of 10
Now that you've defined the hair and neck contour, let's add the details of the face. Start by drawing the eyes, giving them an expressive and intense shape, with slightly arched eyebrows. Then add the ears, making sure they are aligned with the eyes. To finish this step, draw a subtle line for the mouth, conveying Goku's determination. This will bring more life to your drawing!
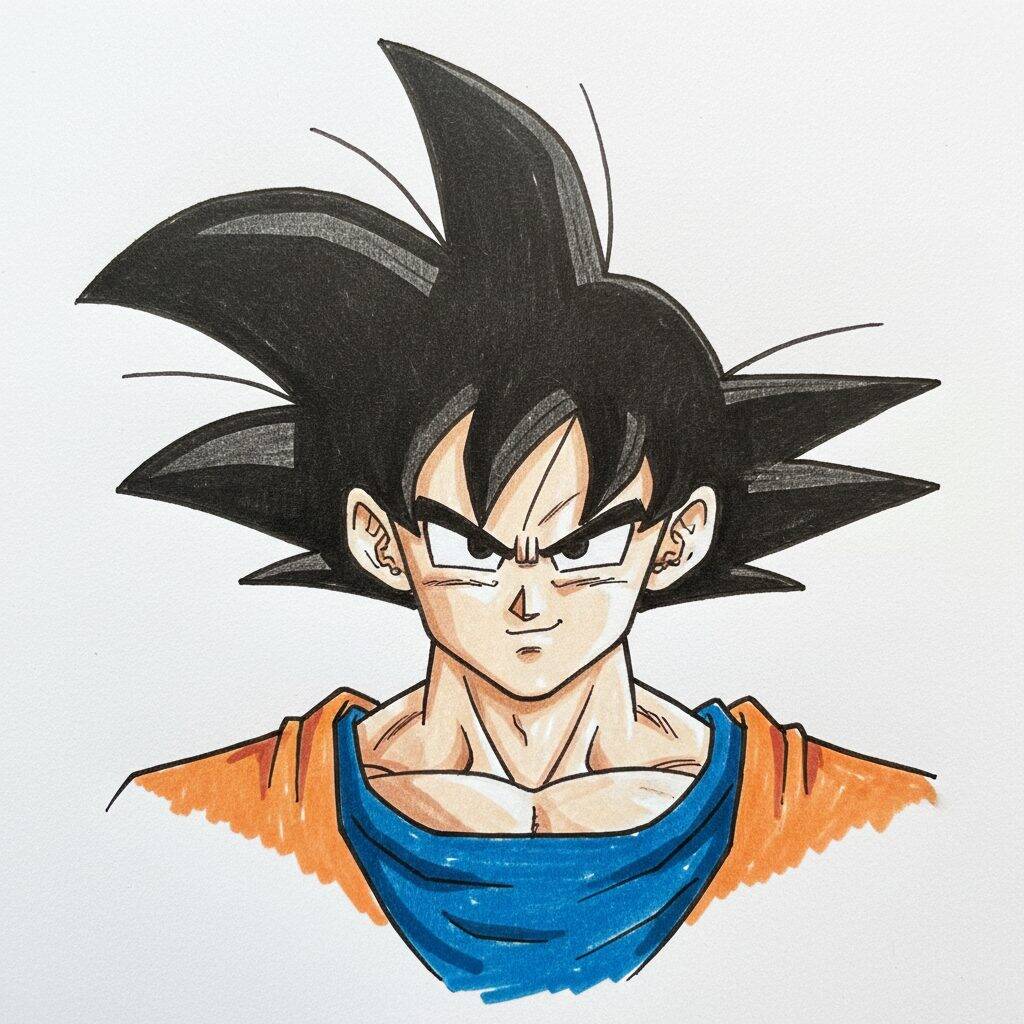
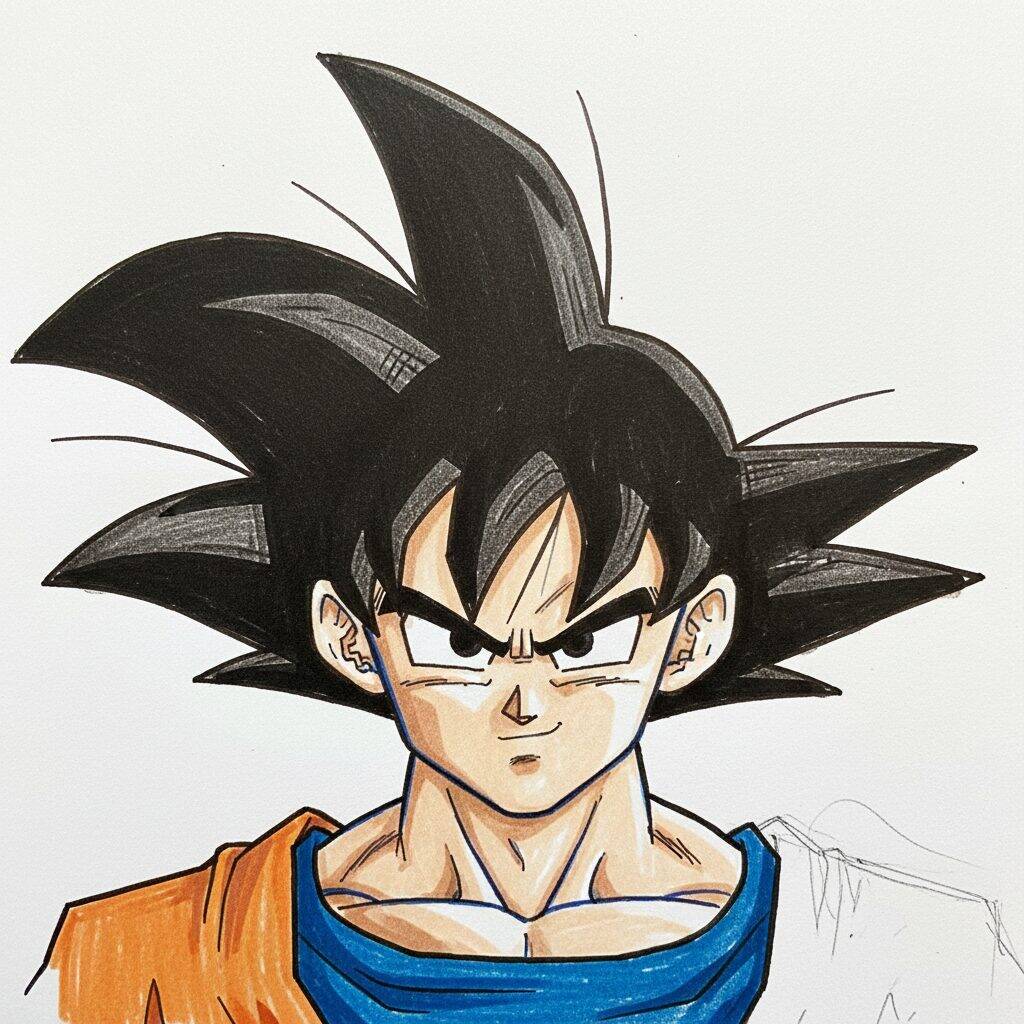
Step 10 of 10
Now that you've finalized the face details, it's time to add colors to your Goku drawing! Start by coloring your hair black, using a very dark tone to highlight the strands. Then, paint the part of the clothing orange, remembering to leave some areas in a lighter tone to create shadows and give depth. For the blue part of the outfit, choose a vibrant tone that contrasts well with the orange. Finish by reviewing the contours, if necessary, to make everything well defined and clear. Congratulations! You've completed your Goku drawing!