


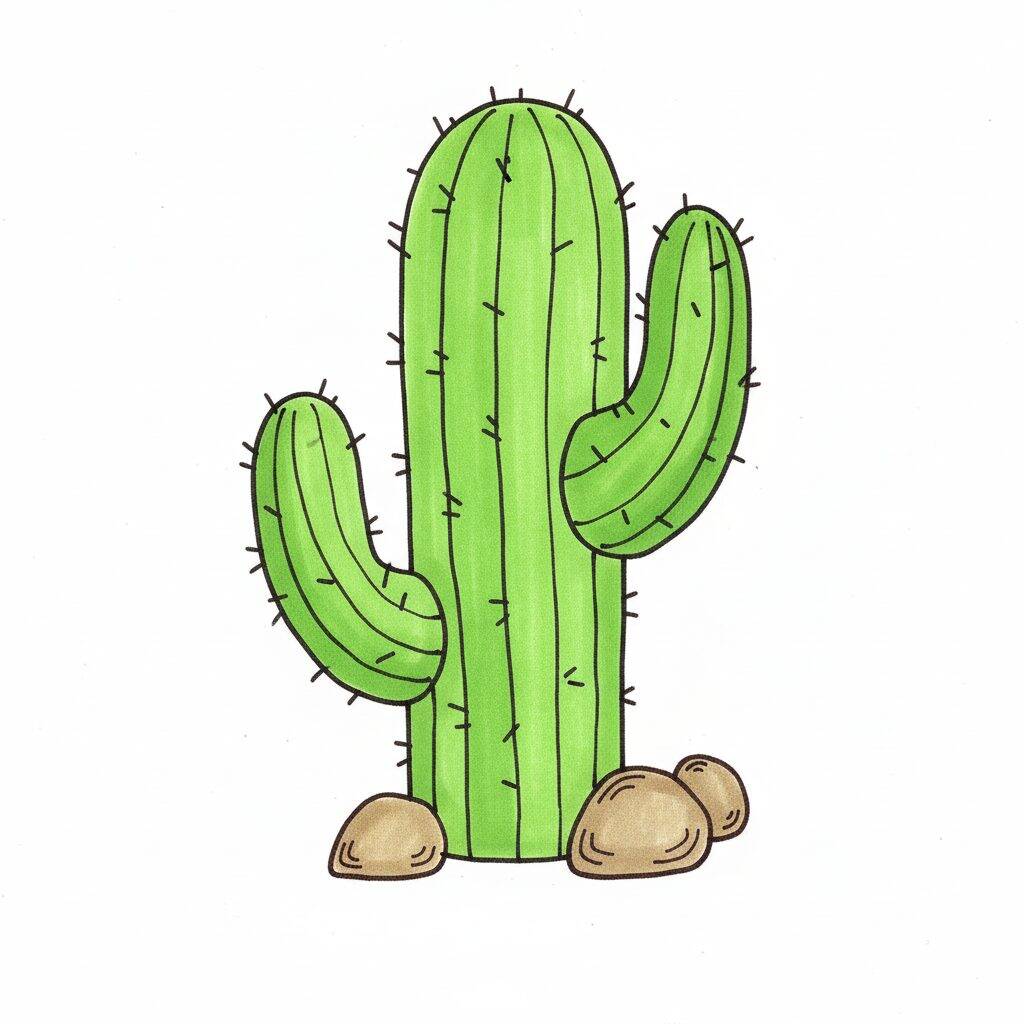
📐 How to Draw — Step by Step
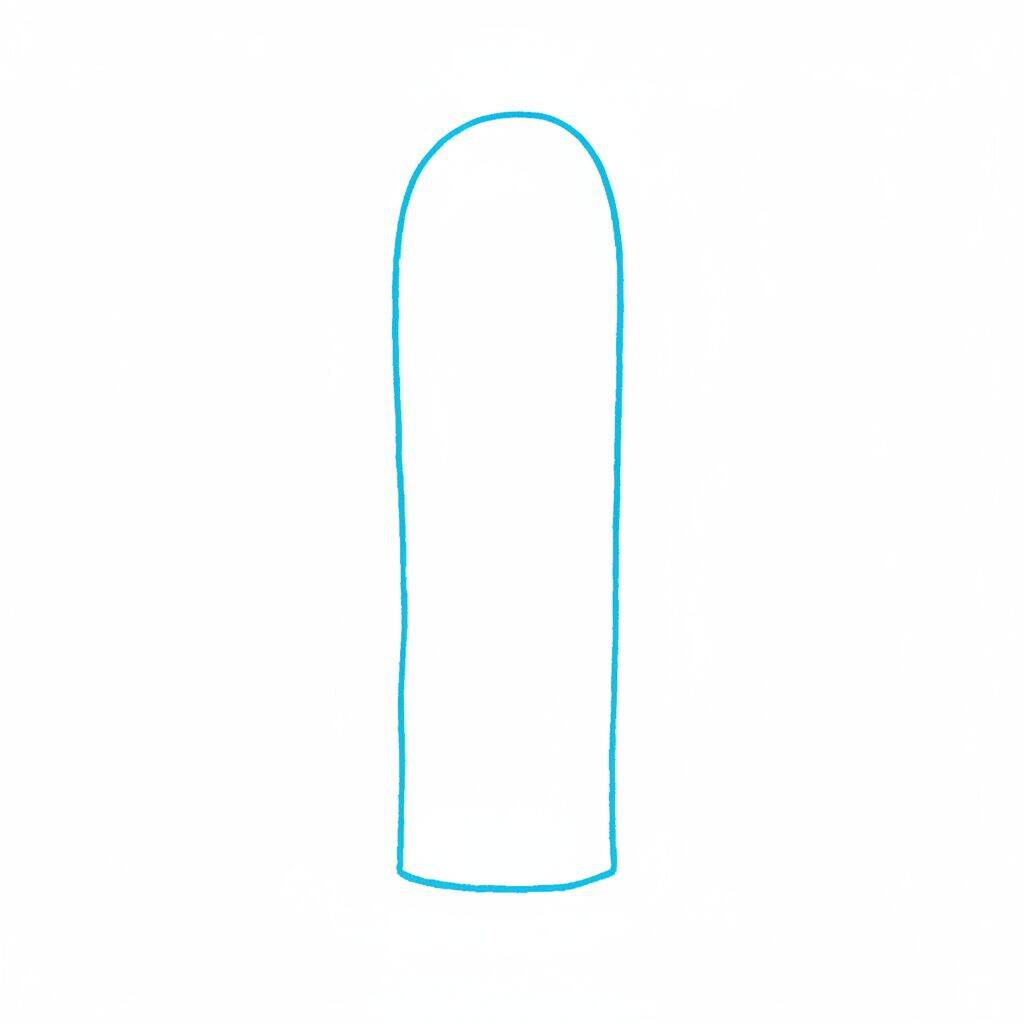
Step 1 of 8
To start drawing a cactus, start by creating the basic shape of the body. Draw a vertical rectangle with slightly rounded edges. The top should be narrower, while the base can be a little wider. This will give it the characteristic appearance of a cactus. Remember that the shape should be a little taller than it is wide.
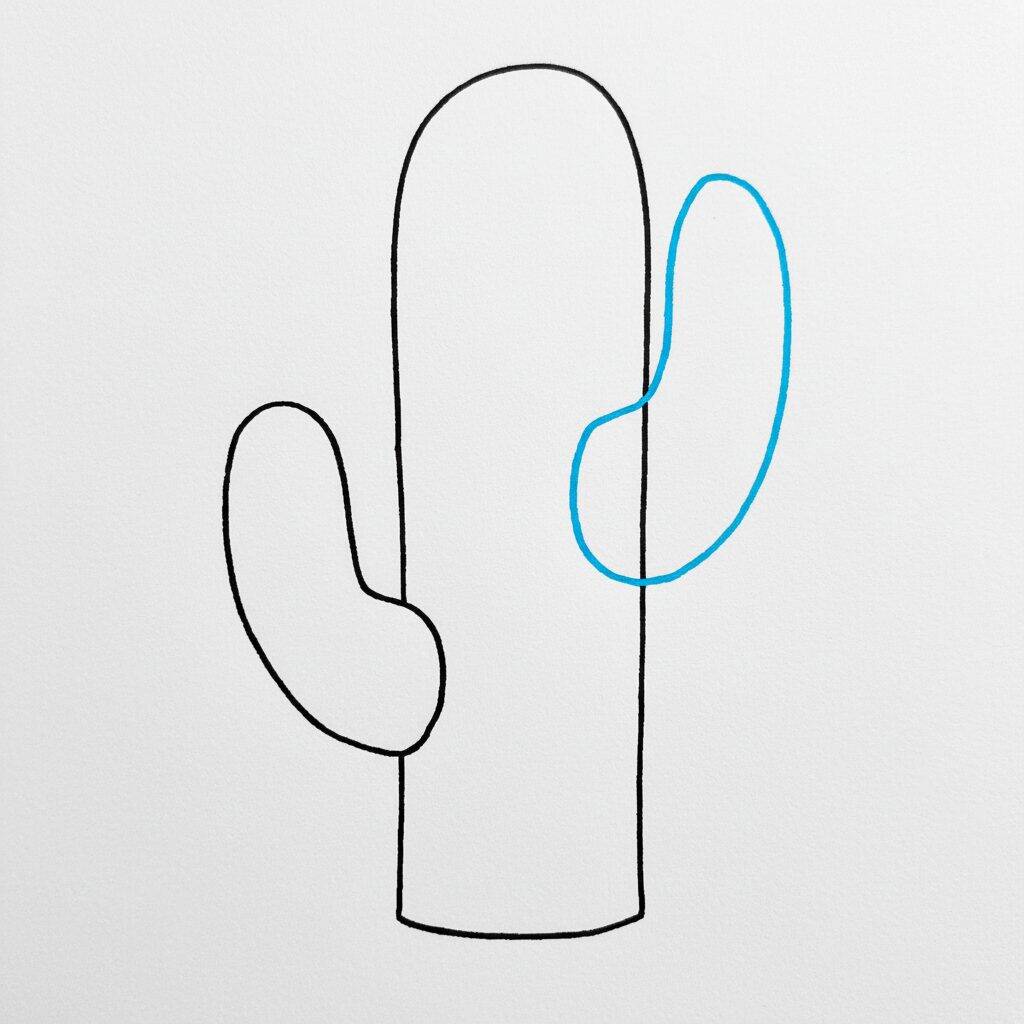
Step 2 of 8
Now, let's add an arm to your cactus! Start by drawing an oval shape that sticks out to the side of the cactus' main body. This shape should be a little wider at the base and narrow at the top. Remember to leave the edges rounded so it looks harmonious. This will give your cactus a more interesting and natural look!
Step 3 of 8
Now, let's give your cactus a little more life! Draw a second arm of the cactus, this time on the opposite side of the first. Use a similar oval shape, but make it a little shorter and thinner. Position it a little higher than the main body to create visual balance. Remember to keep the edges rounded and smooth so your cactus looks harmonious and natural!
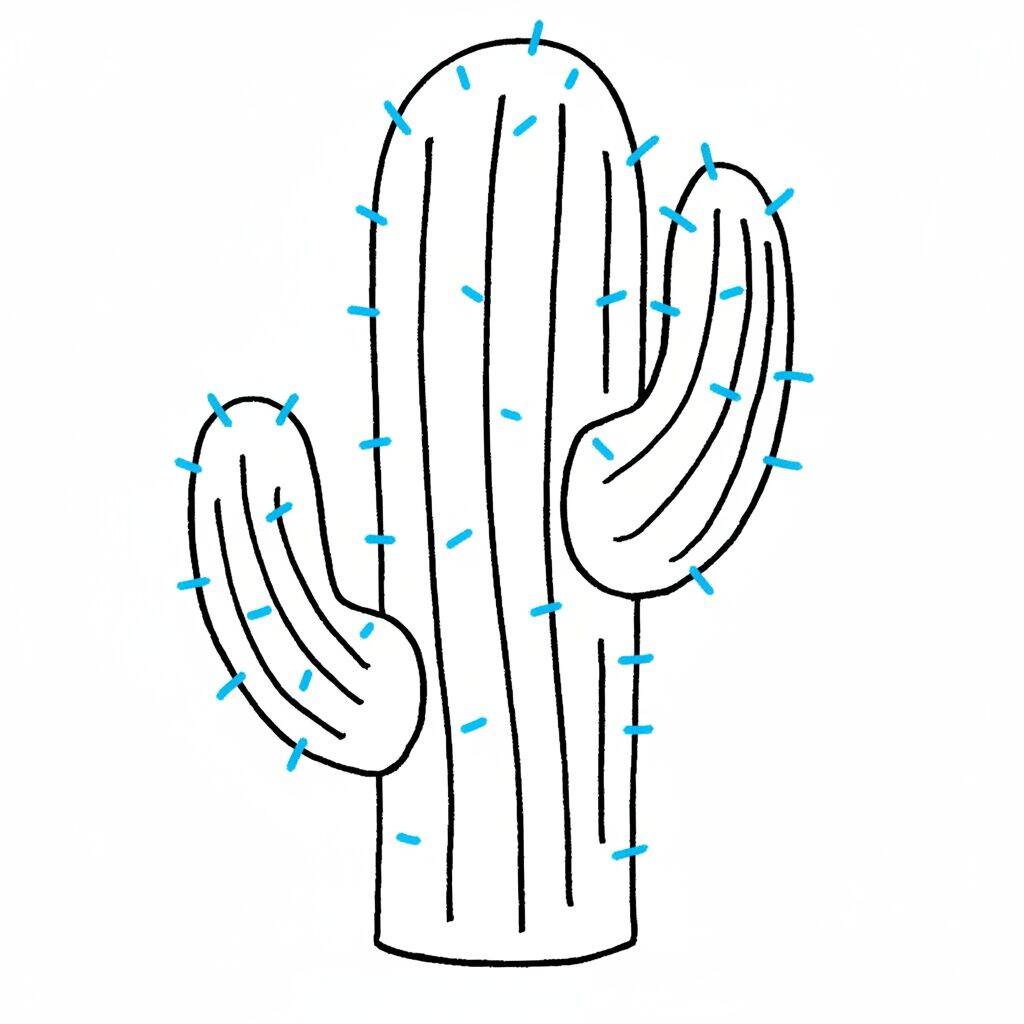
Step 4 of 8
Now that you've added the second arm, let's work on the lines of the cactus! Draw smooth vertical lines along the main body and arms. These lines will help add texture and depth to your drawing. Try varying the width of the lines for a more natural effect. Remember that the lines should follow the curvature of the cactus, so keep them slightly arched for a more realistic result.
Step 5 of 8
Now that you've added the vertical lines to give the cactus texture, it's time to add the spines! Draw small, short, thin lines coming out of the cactus' body and arms. Vary the length and direction of the spines to make them look more natural and organic. Remember to space them evenly, creating a harmonious appearance.
Step 6 of 8
Now that you've added the spines, let's work on the base of the cactus. Draw two oval or semicircular shapes at the bottom of the cactus. These shapes will represent the soil or sand where the cactus is planted. Make sure the lines are smooth and rounded to give a natural feel. This will help anchor the cactus into your composition!
Step 7 of 8
Now, let's add the final details to your cactus! Start by drawing vertical, wavy lines along the body of the cactus to represent the grooves. These lines help give texture and dimension to the plant. Then, if desired, add some small flowers on top of or around the cactus for a colorful touch. Remember, creativity is key, so feel free to customize!
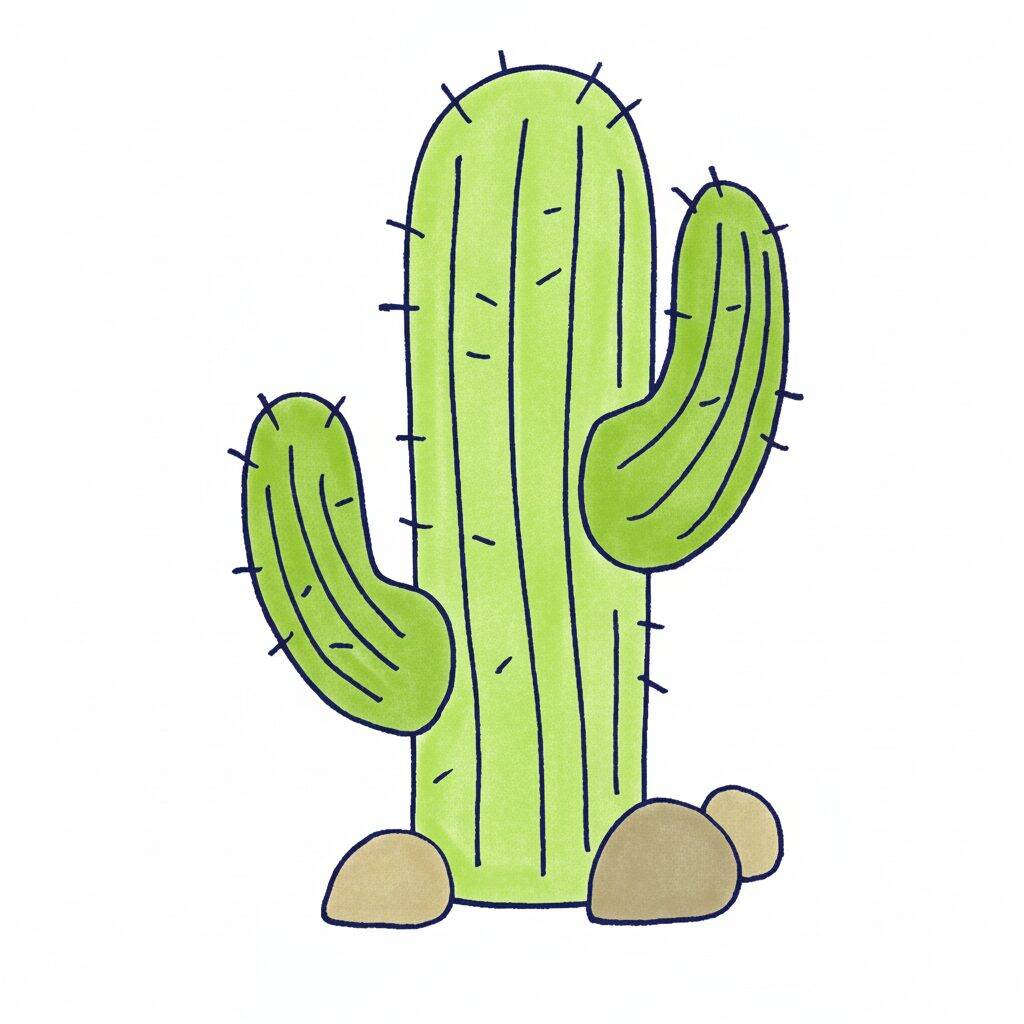
Step 8 of 8
Congratulations! You've reached the end of your cactus drawing! Now review all the details you added. If necessary, darken some lines to make the cactus and its grooves stand out more. You can also add shadows to the surrounding rocks to give it more depth. Feel free Coloring Page or decorate your cactus however you like. Remember, art is a personal expression, so have fun!